Maintaining a reliable scorch torch lighter is essential for anyone who relies on it for tasks ranging from lighting cigars to outdoor activities like camping. These lighters are prized for their powerful flame and durability, but like any tool, they require occasional maintenance to function at their best. One of the most common maintenance tasks is replacing the flint, a small but crucial component that generates the spark necessary to ignite the lighter's fuel. If you've noticed your scorch torch lighter struggling to produce a flame or failing to ignite altogether, it's likely time to replace the flint.
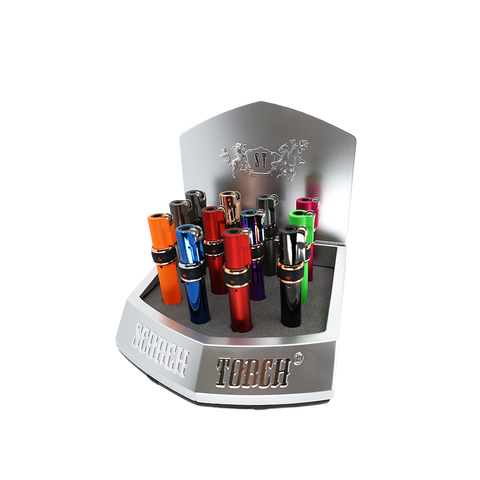
Understanding the Scorch Torch Lighter
Before diving into the step-by-step process of replacing the flint, it's helpful to understand the basic components of a typical scorch torch lighter. These lighters are often designed with a sleek, ergonomic body that houses a refillable reservoir for butane fuel. At the top, there's a nozzle where the flame emerges, controlled by a button or switch. Inside, a flint wheel is responsible for generating sparks when struck against the flint.
The flint itself is a small cylindrical piece typically made of ferrocerium, a synthetic material known for producing hot sparks when scraped against a rough surface. Over time, the flint can wear down or become coated in debris, reducing its effectiveness and requiring replacement.
Tools You'll Need
Before starting the replacement process, gather the necessary tools and materials:
- Replacement Flint: Ensure you have the correct size and type of replacement flint for your specific scorch torch lighter model.
- Screwdriver: Depending on the design of your lighter, you may need a small screwdriver (usually Phillips or flathead) to access the flint chamber.
- Tweezers or Small Pliers: These will help you handle the tiny flint and insert it into the flint tube.
- Clean Cloth or Brush: Use this to wipe away any debris or old flint residue from inside the flint tube.
Step-by-Step Guide to Replace the Flint
Now that you have everything you need, follow these steps to replace the flint in your scorch torch lighter:
Step 1: Prepare Your Work Area
Choose a well-lit and clean workspace where you can comfortably perform the replacement without losing any small parts. Lay down a cloth or paper towel to catch any debris and make the process easier to manage.
Step 2: Remove the Butane Fuel
For safety reasons, it's crucial to start with an empty fuel reservoir. Flip the lighter upside down and bleed the remaining butane by pressing the fuel release valve with a small screwdriver or a similar tool. Hold the valve open until no more hissing sound of escaping gas is heard.
Step 3: Access the Flint Chamber
Depending on your lighter's design, you may need to unscrew or remove a panel to access the flint chamber. Use a screwdriver appropriate for the screws securing the panel. Place the screws in a safe spot to avoid losing them.
Step 4: Remove the Old Flint
Locate the flint wheel and carefully remove the old flint. You may need to use tweezers or small pliers to pull it out gently. Pay attention to how the old flint is positioned so you can insert the new one correctly.
Step 5: Insert the New Flint
Take a new flint and insert it into the flint tube. Ensure it sits snugly but not too tightly. Use tweezers or pliers if necessary to position it correctly.
Step 6: Reassemble the Lighter
Once the new flint is in place, reassemble the lighter by reversing the disassembly steps. Screw the panel back on securely and make sure everything fits together snugly.
Step 7: Test the Lighter
Before refilling the butane reservoir, test the lighter to ensure the new flint is working properly. Depress the ignition button or switch to check if sparks are produced consistently. If sparks are visible, proceed to the next step. If not, double-check the flint position and try again.
Step 8: Refill the Butane
Once you've confirmed that the lighter is sparking correctly, refill the butane reservoir following the manufacturer's instructions. Use high-quality butane to ensure optimal performance and longevity of your scorch torch lighter.
Step 9: Final Check
Give the lighter a final inspection to ensure everything is in place and functioning correctly. Wipe down the exterior with a clean cloth to remove any fingerprints or residue.
Tips for Maintenance and Care
To keep your scorch torch lighter in peak condition:
- Regular Cleaning: Periodically clean the flint wheel and flint tube to remove debris and ensure smooth operation.
- Use Quality Butane: Low-quality butane can clog the lighter and affect performance. Opt for refined butane for best results.
- Store Properly: When not in use, store your lighter in a dry place away from direct sunlight and extreme temperatures.
Conclusion
Replacing the flint in a scorch torch lighter is a straightforward process that can extend the lifespan and reliability of your favorite tool. By following these steps and maintaining your lighter regularly, you'll ensure it continues to provide a steady and powerful flame whenever you need it. With a little care and attention, your scorch torch lighter will remain a dependable companion for lighting cigars, starting campfires, and tackling any other task that requires a reliable flame.