What is Azure AD Connect?
Simply put, Azure AD Connect is a solution to automatically synchronize identity data between their on-premises Active Directory environment and Azure AD. That way, users can use a single identity to access on-premises applications and cloud services such as Microsoft 365.
- It includes a number of technologies:
- Azure AD Connect Sync
- Azure AD Connect Health
- ADFS (Active Directory Federation Services)
- The PHS/PTA/SSSO Provisioning Connector
Azure AD Connect supports integration with other Microsoft products such as Office365, Sharepoint, Dynamics CRM, and Outlook.
Alternatively, you can also consider the cloud-managed solution: Azure AD Connect cloud sync.
What happens if you lose your Azure AD sync?
If you lose your Azure AD sync, it depends on the type of sync you are using.
If you sync password hashes, you can still connect to O365 without issue.
If you use Pass-through Authentication, you’re dead, no access to O365.
When the sync is interrupted, you will not be able to make changes to the on-premises Active Directory and those changes will not be synchronized to Azure AD until you restore connectivity.
How to migrate existing Azure AD connect after a network disaster?
Create the same AD server
Firstly, make sure we have the same AD server with all the identities.
Create an AD with the same domain name. I have my local domain as "clayton.local"
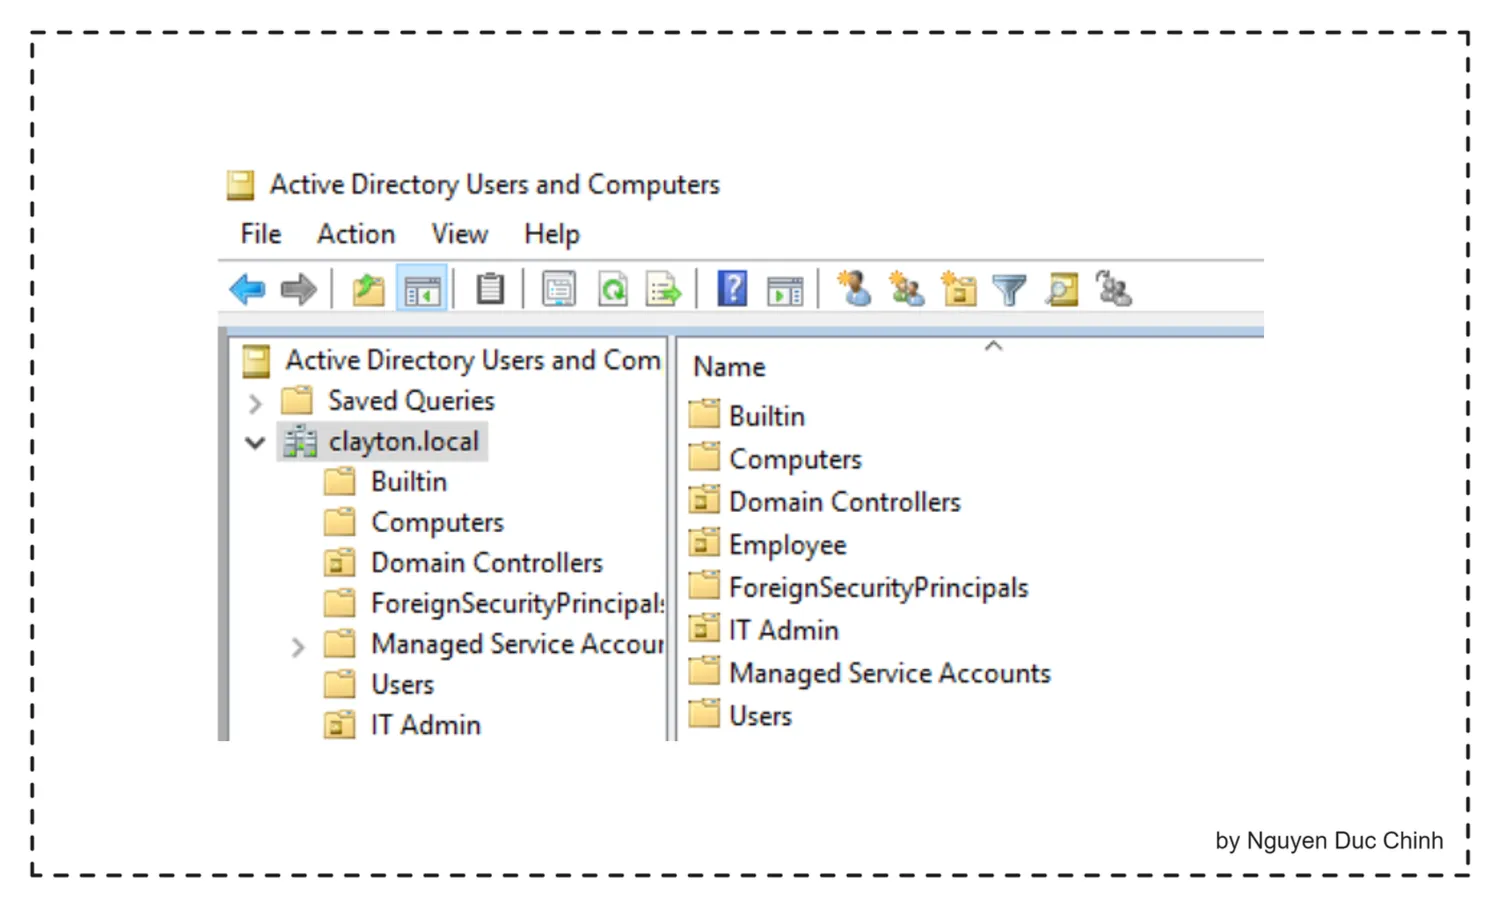
Go to Tool > Active Directory Domain and Trust.
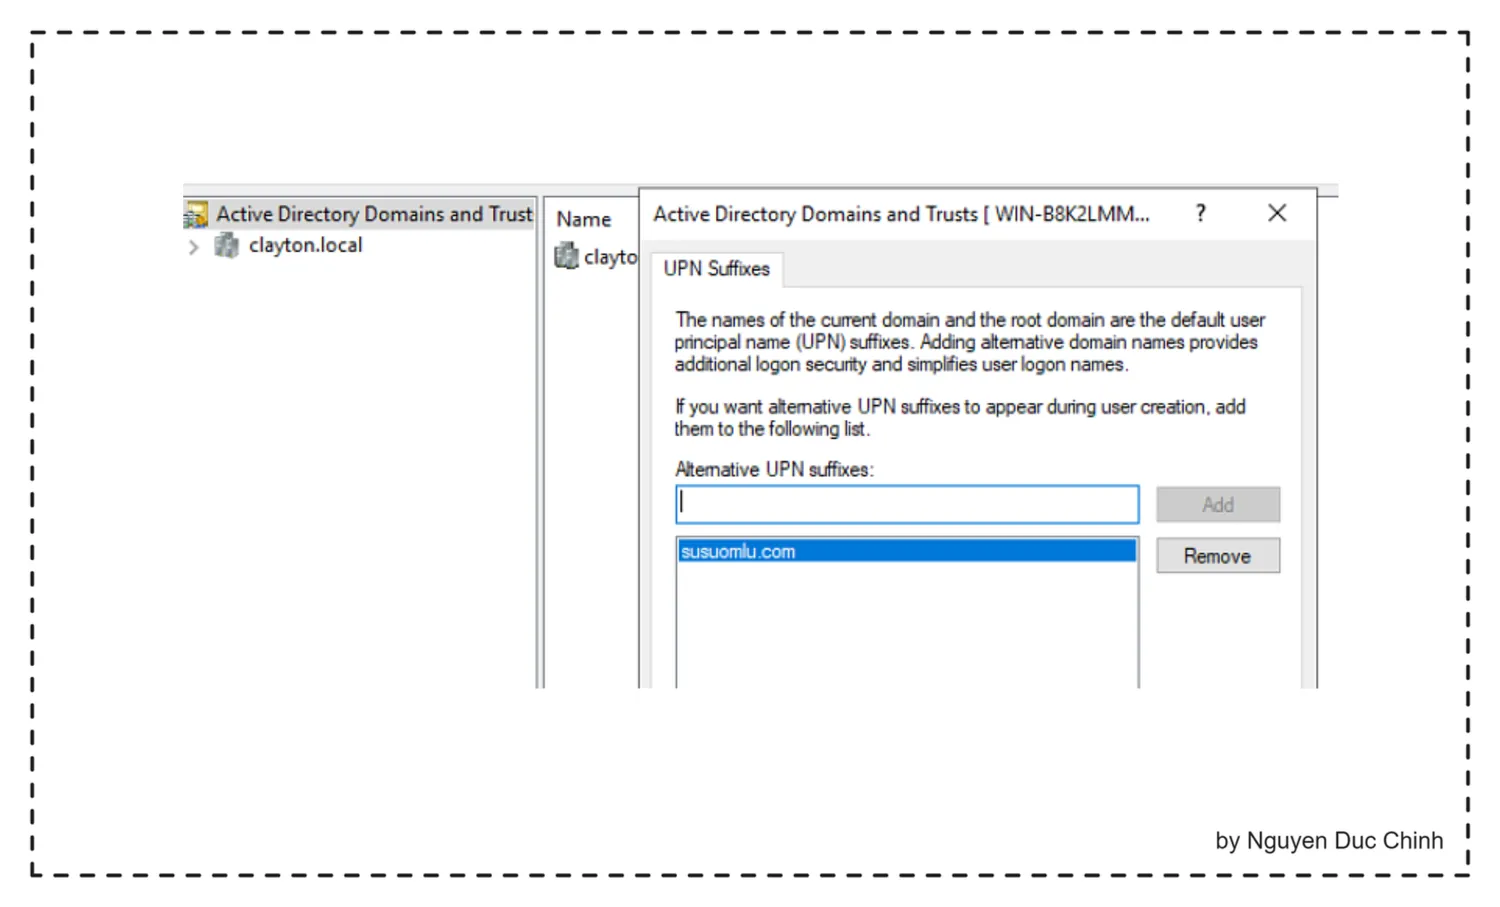
Right-click the domain, choose Properties, and Add Alternative Suffixes.
I use my own: "susuomlu.com". This will be our UPN.
Manually create users with the same SIDs
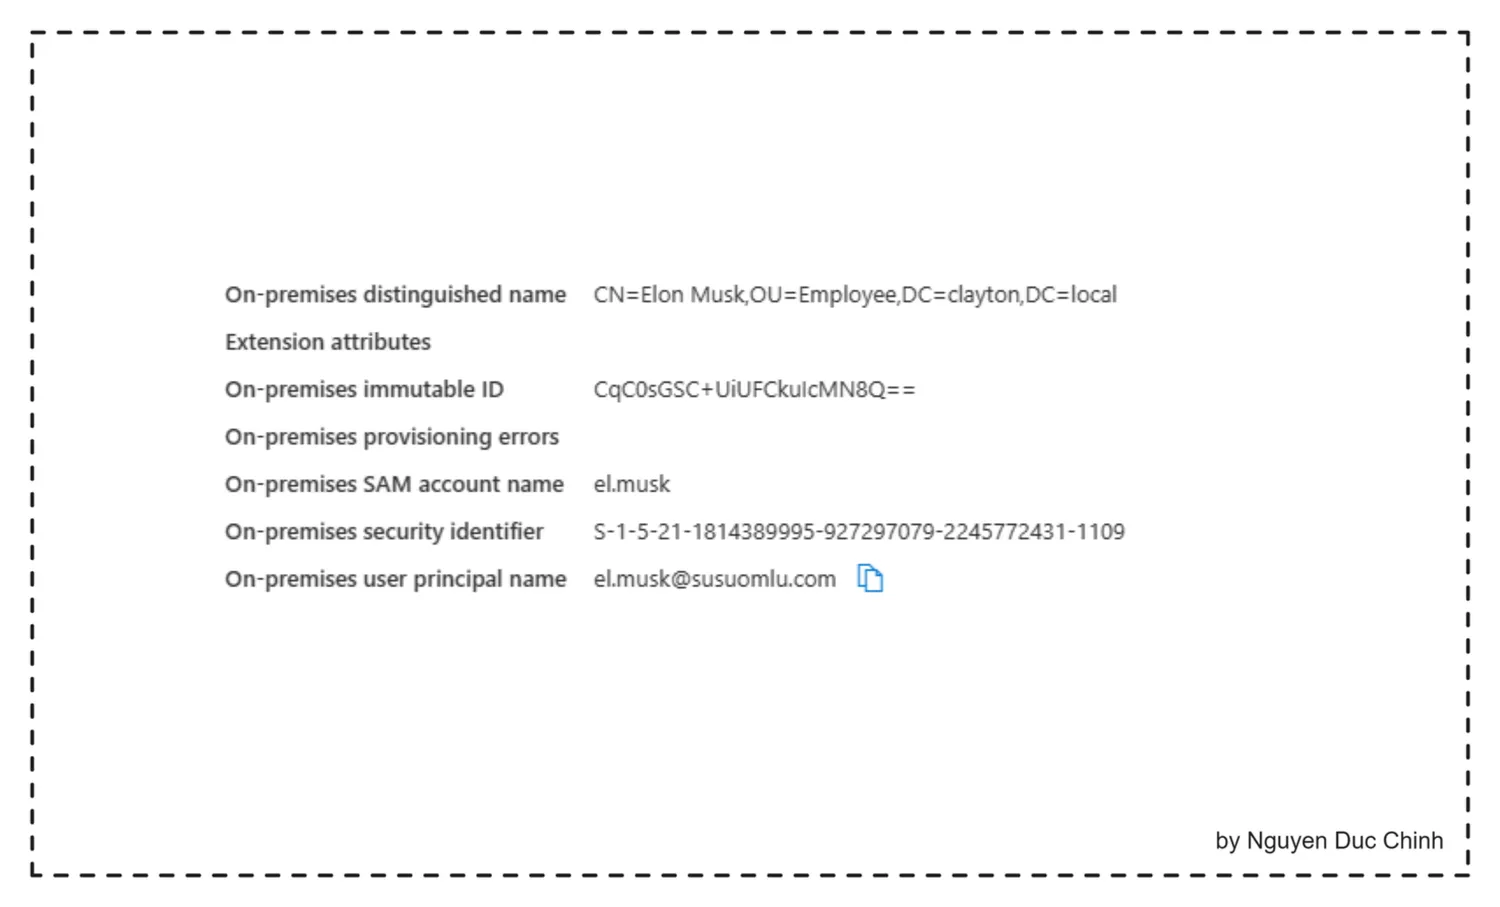
Go to portal.azure.com > Azure Active Directory > Users and select users that need to be synchronized.
Click on 'Properties' and you can see their "On-premises immutable ID" attribute's value.
Or, we can get all IID using the script below:
Install-Module MSOnline
Connect-MsolService
$onlineusers = Get-MsolUser -All | Select-Object UserprincipalName,ImmutableID,LastDirSyncTime| Export-Csv c:\IID.csv -NoTypeInformation
Run the script to get all IID of users, this .csv file is stored at C:\IID.csv
Create the unique SID from Immutable ID
Run this PowerShell Script, and replace the list with the immutable ID from the .csv file.
$IID_List = @('dMIj64cN/0CM9fmLIexC4g==','I4VwJomrjUWzPHk6sMlh3g==','rT8wJf+DrkCcKVxXX7ADzA==','vqhLzR9Mq0aEvHed8eA00Q==') ### You can put more into this list
Function Convert_IID_to_SID ($IID){
    $b64 = $IID
    $bytes = [System.Convert]::FromBase64String($b64)
    $hex = New-Object -TypeName System.Text.StringBuilder -ArgumentList ($bytes.Length * 2)
    foreach ($byte in $bytes) {
    $hex.AppendFormat("{0:x2}", $byte) > $null
    }
    $hex.ToString().ToUpper()
}
Foreach ($item in $IID_List) {
    Convert_IID_to_SID($item)
}
After the run, 32-Digit values should appear. Copy them for later use.
Please carefully check if the SID is correct for each user.
Create new users with the same unique Immutable ID
Create users, using the UPN.
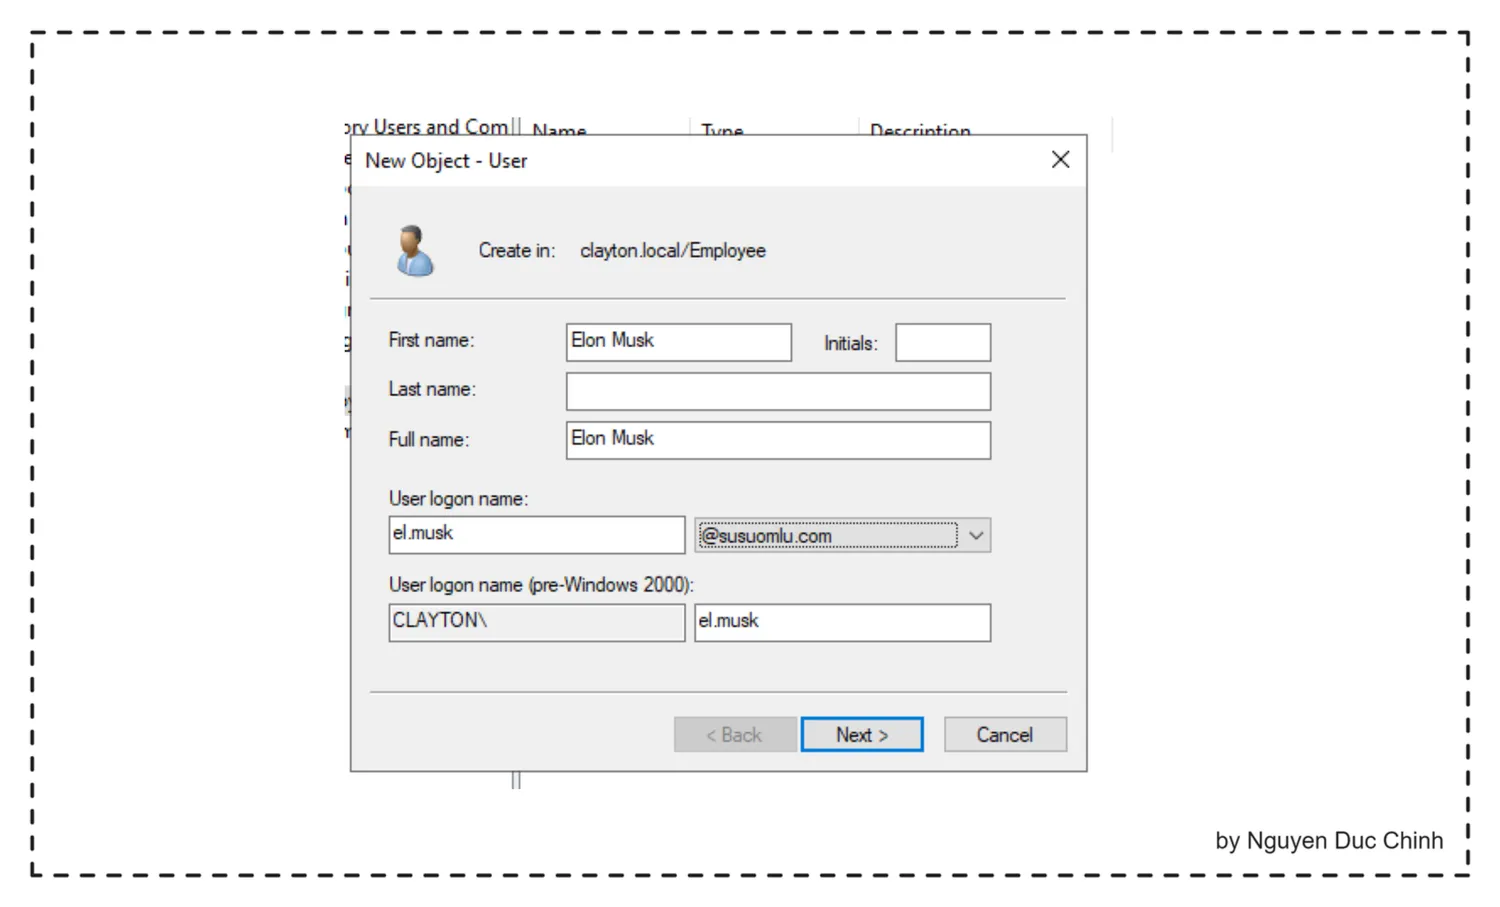
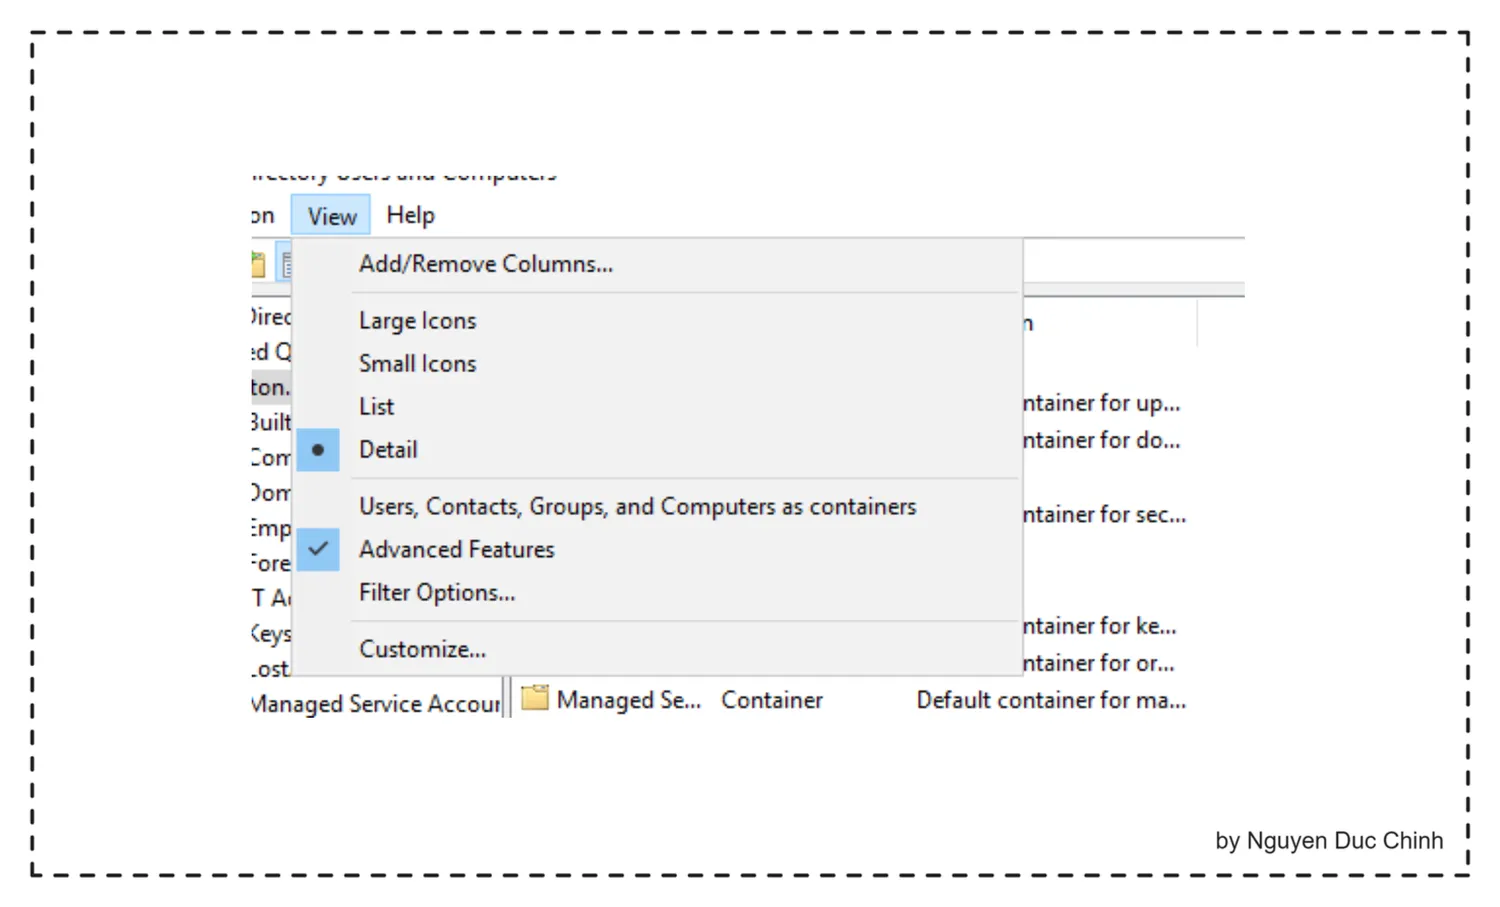
Go to View and Enable Advanced Features
Right Click on the User, go to Properties > Attribute Editor, and find the "ms-DS-ConsistencyGuid" attribute.
Select Edit/Modify for the attribute.
Paste the 32-Digit string from before.
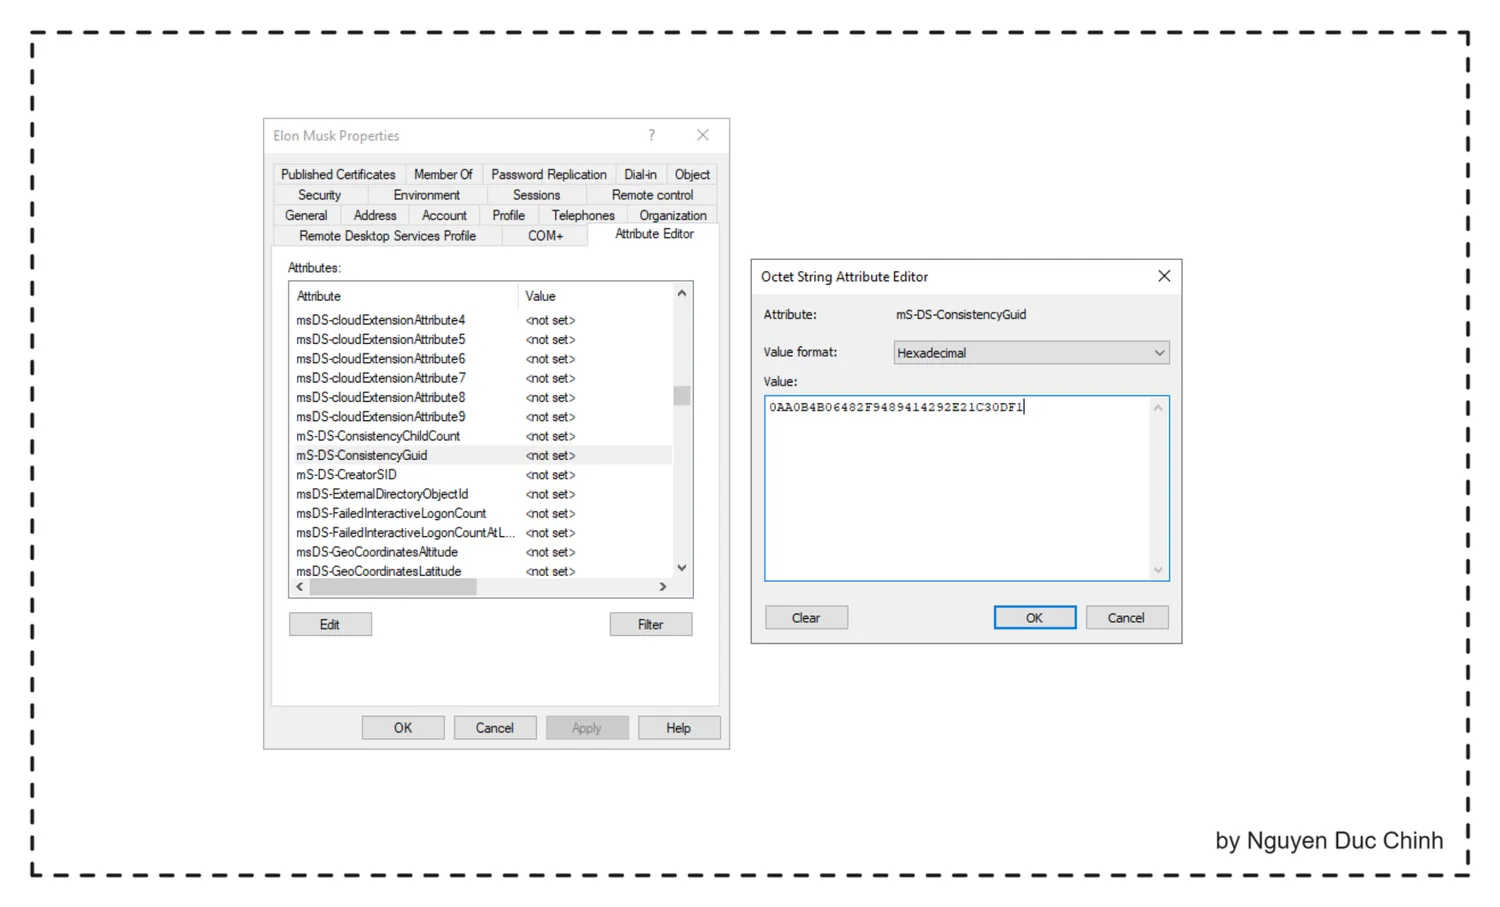
Apply and OK.
You will have to do this for all the users, otherwise, they will be duplicated.
Now, you can install Azure AD Connect and start the sync process again.
The result
This action will create a Service account.
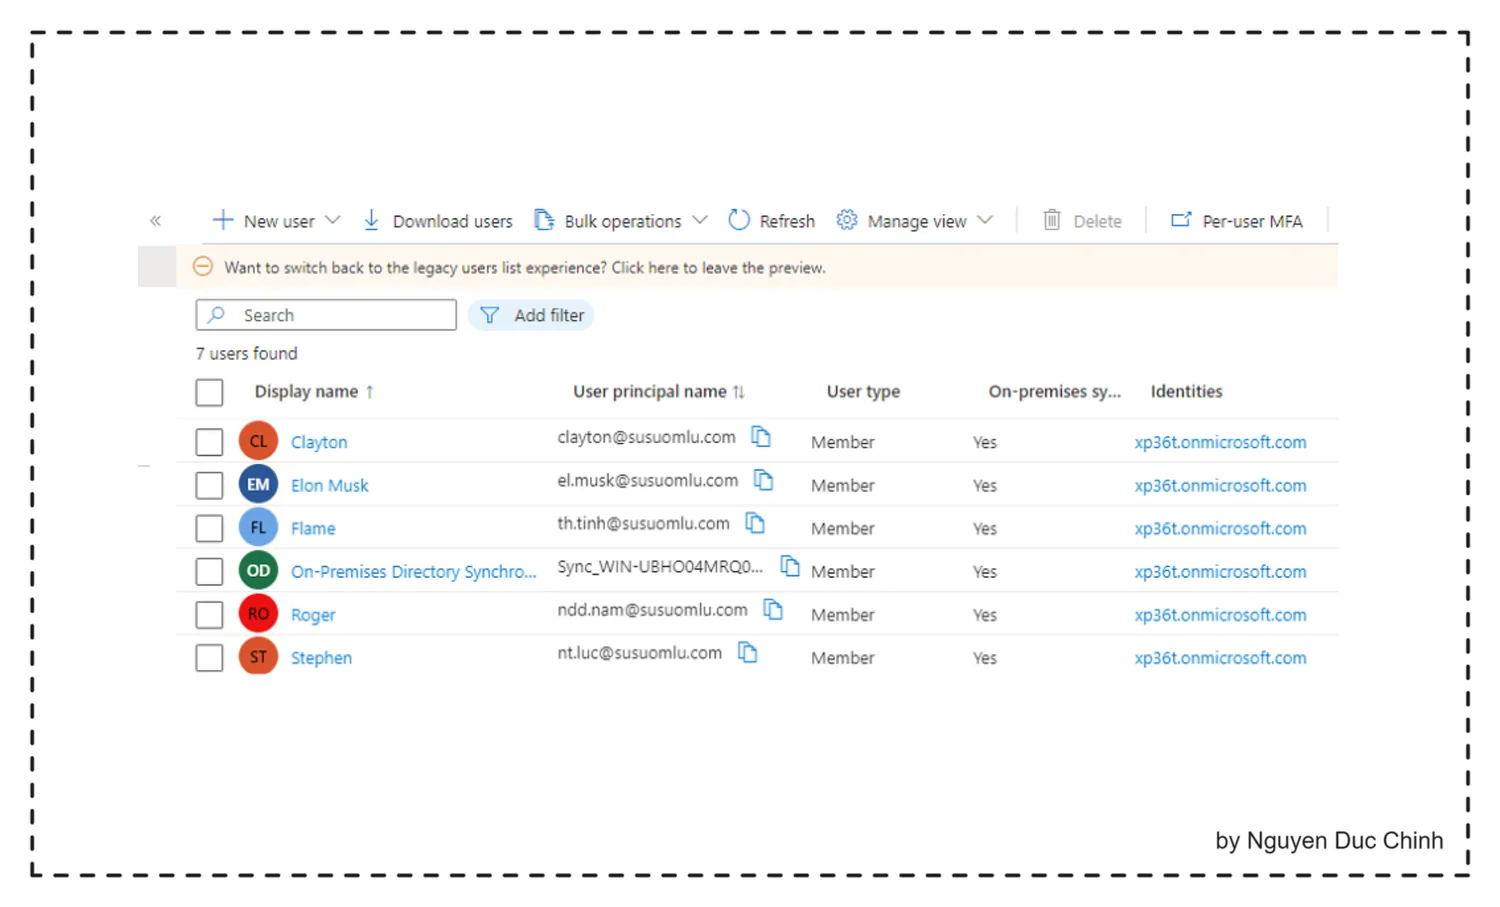
If the SID was modified correctly, other user accounts will not be duplicated.
On Azure Portal, check if Sync Status is Enabled and Last Synced recently.
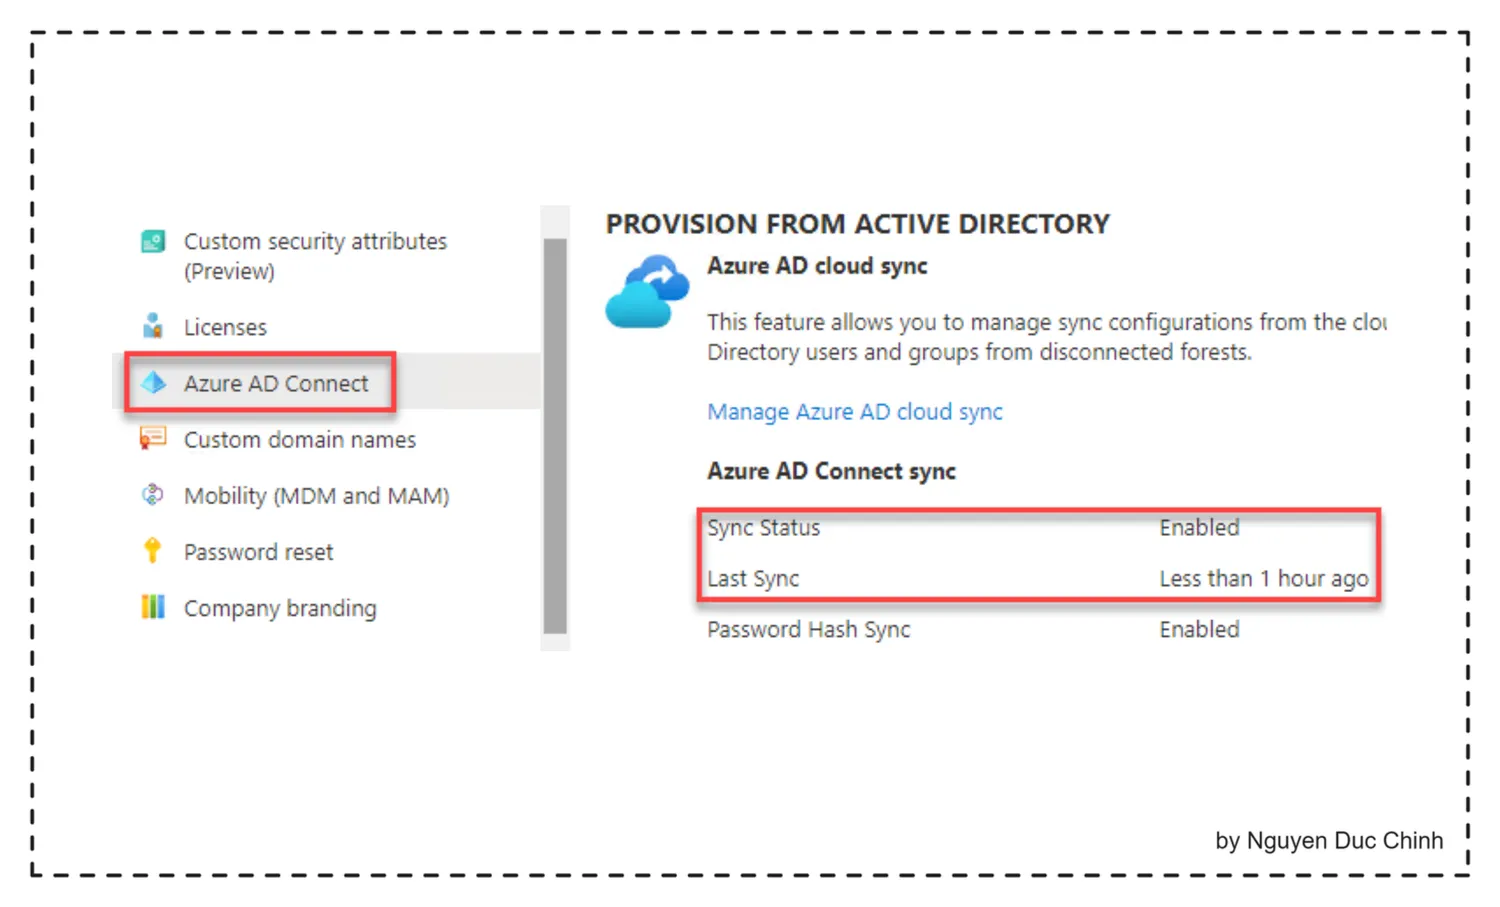
After this, you have successfully migrated your existing Azure AD connect!