Properly drying and curing weed is a crucial step in ensuring the quality, potency, flavor, and shelf life of your cannabis. If done correctly, this process enhances the smoking experience and preserves the cannabis buds for long-term storage. This article delves into the essential steps for drying and curing cannabis, the science behind the process, and best practices for achieving the highest quality results.
Why Drying and Curing Cannabis Is Essential
The process of drying and curing weed is not just about removing moisture. It impacts the chemical composition and quality of the final product. Key benefits include:
- Enhanced Potency
Proper cannabis curing helps preserve and even enhance cannabinoid and terpene profiles, ensuring the buds reach their full potential in potency and flavor. - Improved Flavor and Aroma
Curing weed allows chlorophyll and other undesirable compounds to break down, reducing harshness and promoting smoother, tastier buds. - Preventing Mold
Slowly reducing moisture content ensures that the buds are dry enough to prevent mold growth without becoming overly brittle. - Extended Shelf Life
Proper curing bud methods stabilize the product, allowing it to remain fresh and potent for months, even years, if stored correctly.
Step 1: Harvesting Cannabis at the Right Time
The process starts with harvesting your cannabis plants when the buds are at peak maturity. Signs of readiness include:
- Milky or amber-colored trichomes observed under a magnifying glass.
- Pistils that have darkened and curled inward.
After harvesting, avoid handling the buds excessively to prevent damaging the trichomes, where most cannabinoids and terpenes reside.
Step 2: Drying Cannabis
Drying is the first step in the post-harvest process. It removes most of the moisture content to prepare the buds for curing.
2.1 Ideal Environment for Drying
- Temperature: 60-70°F (15-21°C)
- Humidity: 50-60%
- Airflow: Gentle circulation to prevent stagnant air and mold growth.
- Lighting: Keep the drying area dark to protect cannabinoids and terpenes from degrading under light exposure.
2.2 Drying Methods
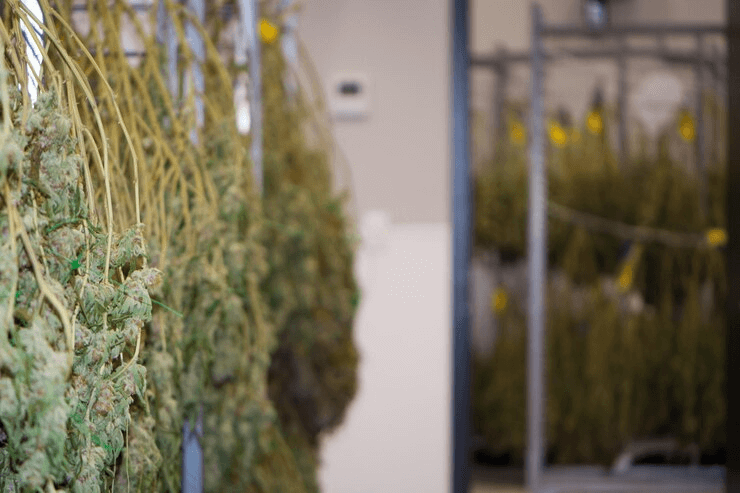
- Hang Drying: Trim the large fan leaves and hang the branches upside down in the drying space.
- Drying Racks: Useful for smaller buds or operations with limited space.
- Whole Plant Drying: Ideal for slower drying but requires more room.
The drying process typically takes 7-10 days. You’ll know the weed is ready for curing when smaller stems snap instead of bending.
Step 3: Trimming the Buds
Once the buds are dry, trim off the remaining sugar leaves. While this step is optional for personal growers, trimmed buds improve visual appeal and reduce harshness when smoked.
- Wet Trim: Performed immediately after harvest. It’s faster but less suited for humid environments as it increases the risk of mold.
- Dry Trim: Performed after drying. It is slower but better for preserving cannabinoids and terpenes.
Step 4: Curing Cannabis
Curing is the process of slowly removing the remaining moisture from the buds to stabilize them and enhance their quality.
4.1 Equipment Needed
- Airtight Glass Jars: Mason jars are a popular choice for curing weed.
- Hygrometers: To measure humidity levels inside the jars.
- Humidity Packs: Optional but useful for maintaining ideal humidity levels.
4.2 The Curing Process
- Fill the Jars: Place the dried buds loosely in the jars, leaving some space at the top for airflow. Avoid packing them too tightly.
- Seal and Store: Close the jars and store them in a dark, cool space. The ideal conditions for curing cannabis are:Temperature: 60-70°F (15-21°C)
Humidity: 55-65%
- Burping: During the first week, open the jars daily for 10-15 minutes to release excess moisture and replenish oxygen.
- Monitor Humidity: Use a hygrometer to ensure the humidity stays within the ideal range. If it’s too high, leave the jars open for longer. If it’s too low, consider adding humidity packs.
Curing typically takes 2-4 weeks but can extend up to 6 months for optimal results. Patience is key; the longer you cure, the better the quality of the buds.
Step 5: Storing the Cured Weed
Once the buds are properly cured, store them in an airtight container in a cool, dark place. Avoid plastic bags, as they can degrade the quality over time. Glass jars with airtight seals remain the best option for long-term storage.
Common Mistakes to Avoid
- Rushing the Process
Skipping or rushing the drying and curing weed steps can result in harsh, low-quality buds. - Improper Humidity Control
Failing to maintain the correct humidity levels during curing can lead to moldy or overly dry buds. - Excessive Handling
Overhandling the buds can damage trichomes, reducing potency and flavor. - Using Plastic Containers
Plastic can release unwanted chemicals and static electricity, which degrade the quality of the weed.
Advanced Tips for Drying and Curing Weed
- Slow and Steady Wins the Race: The slower the drying and curing process, the better the results.
- Use Professional Drying Racks: For commercial operations, investing in specialized drying racks ensures consistency and efficiency.
- Experiment with Terpene Retention: Some growers add citrus peels or herbs to curing jars to experiment with flavor profiles.
- Monitor Regularly: Keep a close eye on the curing environment to catch and correct any issues early.
Final Thoughts
Drying and curing bud are essential steps for any cannabis grower aiming to produce high-quality weed. By following these steps and maintaining patience throughout the process, you can achieve cannabis that is potent, flavorful, and long-lasting. Whether you’re growing at home or managing a large-scale commercial operation, mastering the art of curing cannabis ensures that your hard work during cultivation pays off in the final product.