Microsoft Outlook is one of the most well-known and reputable email clients, with an estimated 400 million users. However, despite its great popularity, many email marketers have a conflicted relationship with Outlook, largely due to its intricate rendering standards.
These rendering standards can make both creating and testing emails difficult. And this is exactly why many Outlook users opt for using email templates, as once perfected, email templates can be used over and over again, thus avoiding rendering issues.
In this article, we are going to provide you with a guide on creating email templates in Outlook. So, if you are interested in learning more, keep on reading!
What is an Outlook email template?
Just like in Word and Excel, templates in Outlook are documents that come with specific details and/or formatting already included, which don’t need to change from message to message.
Using templates helps save time and effort as you can create emails with the same ones repeatedly, with minor or even major modifications, of course. Therefore, you don’t have to compose each new email from scratch. Instead, you can just use a saved template.
When saved on your device (“File” -> “Save As” -> “Outlook Template (*.oft)”), Outlook templates have the .oft file extension. And by default, the folder where all your templates can be found will be C:\Users\UserName\AppData\Roaming\Microsoft\Templates.
Creating an email template in Outlook
Whether you want to send appreciation emails, a business proposal, a newsletter, an email informing customers about new terms and conditions, or something completely different more than once, you can use Outlook email templates.
A template will come with the same email content each time, so you will only have to change a few details for each new recipient.
To create an Outlook email template, follow these steps:
- Open Outlook and click “Home” in the top menu bar. Then select the “New Email” option from the displayed dropdown menu. As an alternative to this, you can simply press “Ctrl + N” on your keyboard.
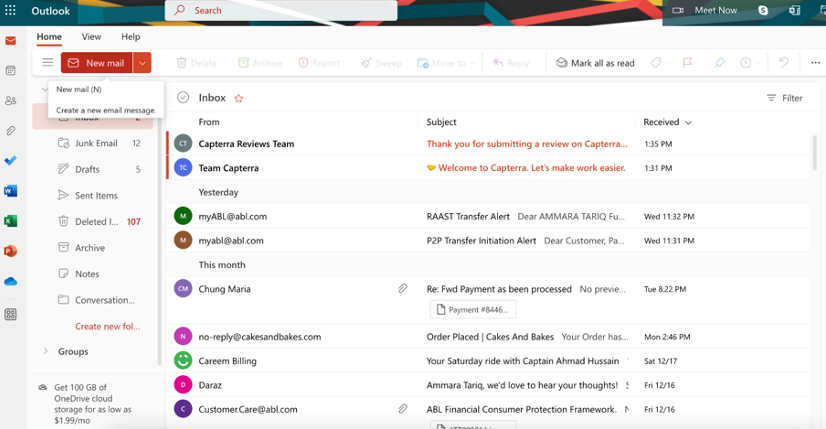
- After initiating the creation of a new message, a blank message window will appear, as shown in the image below.
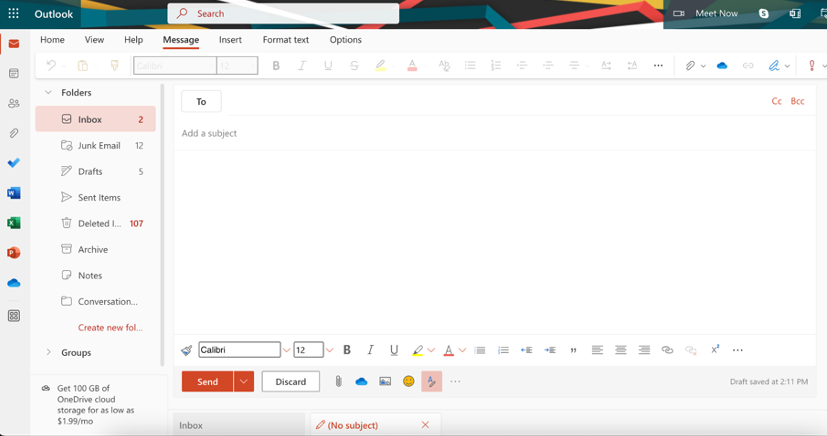
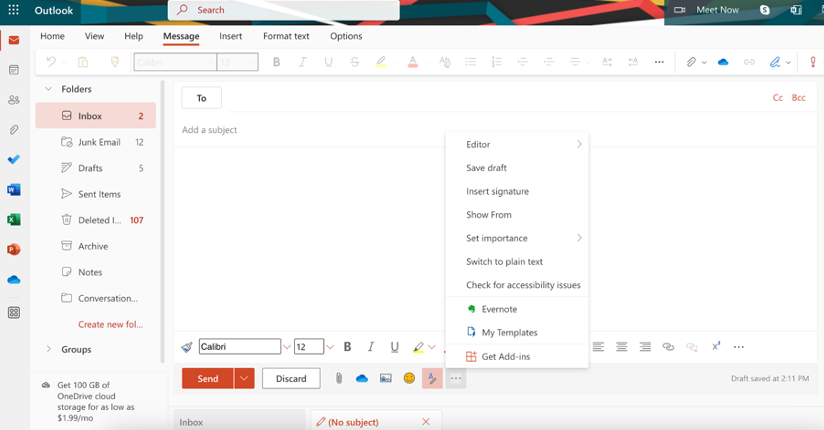
- To now switch from working with messages to working with templates, click on the three dots at the bottom of the message window. This will open a menu containing the option “My Templates.” Select this option.
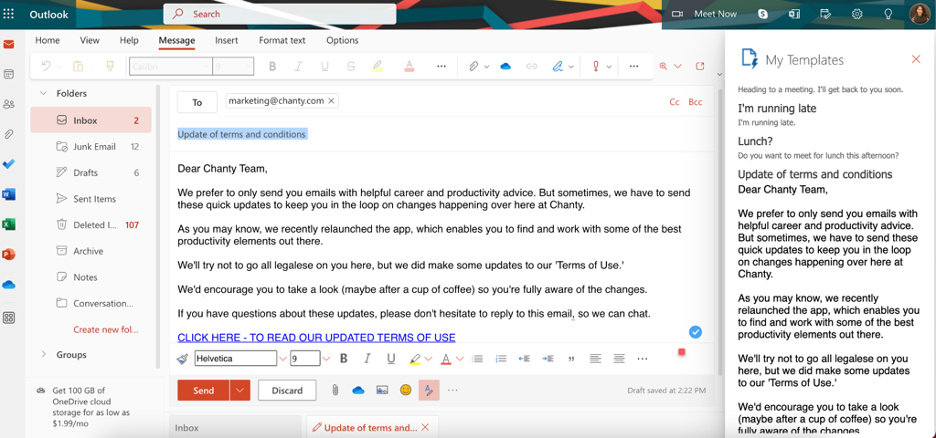
- After you select “My Templates”, a new window will pop up on the right side of your Outlook dashboard. There, you will see the default Outlook templates such as “I’ll reply later”, “I’m running late”, and “Lunch?”
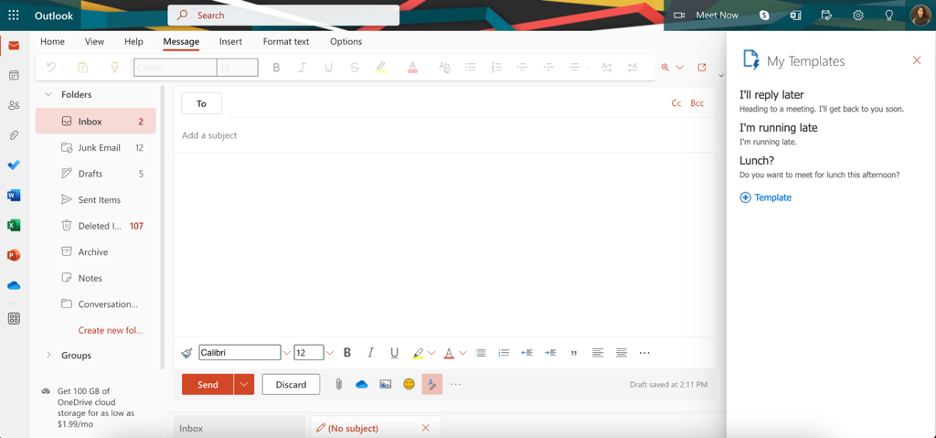
- Next, you need to decide whether you want to use any of the default templates and customize them according to your needs or create a new one by clicking the “+Template” button in the My Templates window.
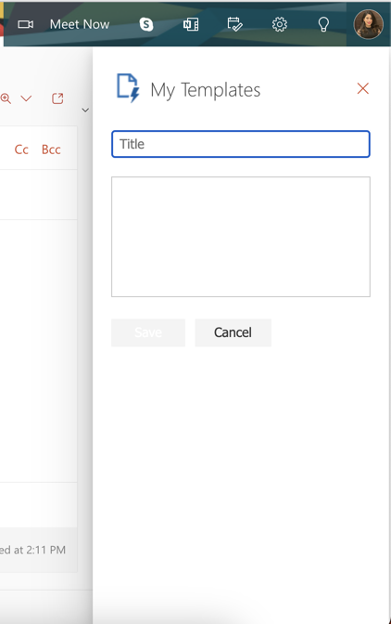
- If you decide to create a new template, a form will appear using which you need to fill in details for the template – the title and the content. Once all details have been filled in, click the “Save” button in blue.
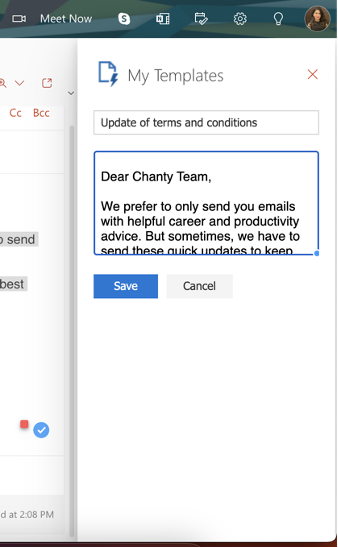
- At this point, your template is ready for use. If you need to edit or delete it, you can do so using the options displayed in the My Templates window. But do keep in mind that this editing option is intended only for small changes. We will cover more advanced editing in the next section of the article.
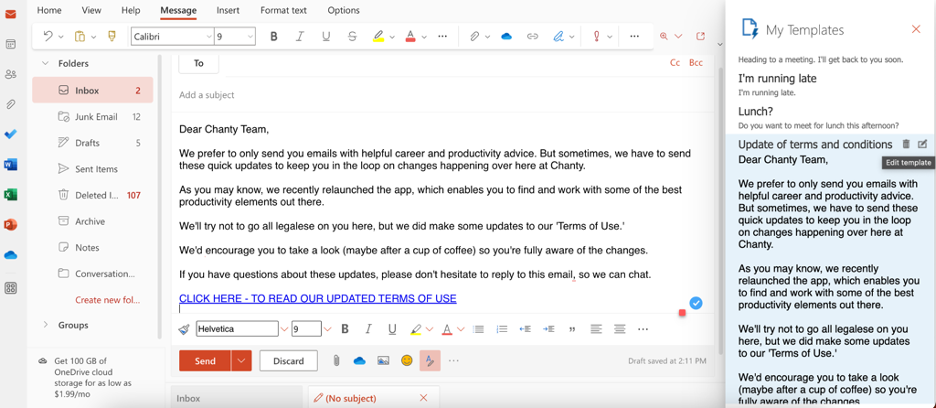
- If you now select your template, its content will show up in the Outlook message window, where you can further enhance it with additional text, attachments, audio, or images.
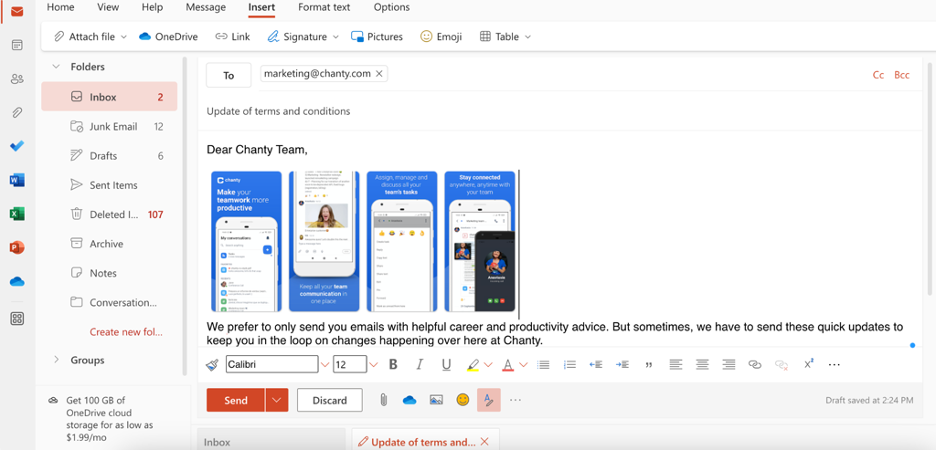
- Lastly, before sending an email created with the template, remember to add the desired subject line and the recipients you want the email to be sent to.
Editing Outlook email template content
Suppose you want to change the font, color, or spacing to improve the look of your template content.
To do that, first, choose the template you want to edit so its content loads in the message window.
Then, select the “Format Text” option in the top menu bar, which will provide you with a range of different editing tools. Using those, you can change things such as font size and style, text color, spacing, indentation, etc.
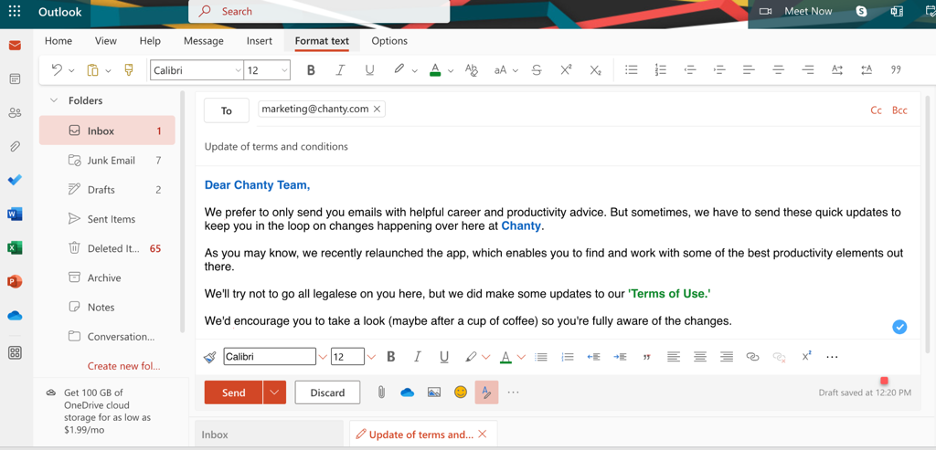
Once you are happy with the edits, feel free to proceed with sending the email.
Thank you for reading till this point! We hope you’ve learned how to edit email templates in Outlook quickly. Check out the original guest post to learn more. :)