Recording a professional-quality podcast from home has never been easier, especially with the right microphone setup. RØDE microphones are among the most popular choices for podcasters because of their studio-grade sound and versatility. Whether you’re starting your first show or upgrading your gear, learning how to properly record a podcast using a RØDE mic can make a major difference in audio quality and listener experience.
Understanding the Basics of Podcast Recording
Before diving into the setup, it’s important to understand what makes a great podcast recording. Your microphone, room acoustics, and recording technique all play key roles. RØDE offers a range of microphones — from USB plug-and-play models to XLR studio mics — designed to capture clear, detailed voice recordings.
At its core, good podcast sound comes from balancing clarity, tone, and consistency. Even if you’re working in a small home studio, optimizing your environment and gear setup can help you achieve a polished, professional result.
Choosing the Right RØDE Microphone
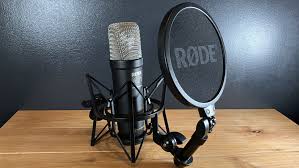
RØDE produces several microphones suitable for podcasting, such as the RØDE PodMic, NT1, and NT-USB+. The best option depends on your workflow and setup:
- RØDE PodMic: A dynamic broadcast mic known for its rich tone and rejection of background noise, ideal for untreated rooms.
- RØDE NT1: A condenser microphone that delivers stunning detail and clarity, perfect for quieter environments or treated spaces.
- RØDE NT-USB+: A USB condenser mic that’s beginner-friendly and requires no audio interface.
If you’re unsure which model suits your needs, you can explore options at a reliable camera shop like Fusion Max, where a range of RØDE gear and podcast accessories are available for creators in Pakistan.
Setting Up Your Recording Space
Your environment impacts your sound more than you might think. For podcasting at home, try to record in a small, quiet room with soft furnishings that absorb echoes — like curtains, carpets, or cushions. Avoid rooms with bare walls or tiled floors, as they create unwanted reverb.
If you’re using a condenser microphone like the RØDE NT1, be extra careful with background noise, since condenser mics are more sensitive. For dynamic models like the PodMic, positioning and mic technique matter most.
Connecting Your RØDE Microphone
There are two main ways to connect your RØDE microphone:
- USB Microphones: Simply plug the RØDE NT-USB+ into your computer, open your recording software (like Audacity or Adobe Audition), and select the mic as your input device.
- XLR Microphones: For mics like the RØDE PodMic or NT1, you’ll need an audio interface such as the Focusrite Scarlett Solo or RØDE AI-1. Connect the mic via XLR cable, adjust the gain, and monitor your sound through headphones.
Whichever method you use, ensure your input levels are not peaking. Aim for a steady level that stays within -6dB to -12dB to preserve headroom during editing.
Recording Your Podcast
When you’re ready to record, focus on mic placement. Keep the microphone about 6 to 8 inches away from your mouth. Use a pop filter to minimize plosives (the harsh “p” and “b” sounds) and maintain consistent speaking distance.
Record in WAV format for the best sound quality. If possible, use headphones to monitor your voice while recording — this helps detect background noise or clipping before it becomes an issue.
Many podcasters today use OBS, Audacity, or Reaper for audio capture. Each software allows easy adjustments for gain, EQ, and compression to refine your sound before finalizing the episode.
Editing and Enhancing Your Podcast
After recording, it’s time to polish your audio. Remove long pauses, background noise, or volume inconsistencies. Adding EQ and compression can help make your voice sound fuller and more balanced.
If you’re new to audio editing, tools like Audacity or RØDE’s own RØDE Connect software are excellent starting points. They’re user-friendly and optimized for RØDE microphones, giving you smooth control over multiple tracks and effects.
Adding Professional Touches
A great podcast isn’t just about voice clarity — it’s about presentation. Include background music, intros, and outros that match your podcast’s theme. Make sure your final export is at least 128 kbps MP3 or 44.1 kHz WAV for clean distribution on Spotify, Apple Podcasts, or YouTube.
Using the best microphone for vlogging can also enhance mobile podcasting setups, especially for creators who record interviews or outdoor sessions. Many RØDE wireless systems can double as podcast tools, offering convenience without compromising quality.
Final Thoughts
Recording a podcast with a RØDE microphone from home can deliver professional, studio-grade results when done right. With the right gear, acoustic setup, and recording technique, you can produce content that sounds as good as popular shows recorded in full studios.
Fusion Max provides access to authentic RØDE microphones and accessories across Pakistan, helping local creators take their audio projects to the next level. Whether you’re just starting or upgrading your setup, investing in quality sound equipment is the first step toward creating a successful podcast.