Old photographs are more than just images; they are windows into our past, capturing precious moments and telling stories that define our personal histories. However, these treasured images often bear the scars of time—fading colors, creases, and physical damage can detract from their beauty and significance. Fortunately, restoring photo has never been easier thanks to modern technology and innovative techniques. Whether you're looking to revive family portraits, wedding pictures, or cherished snapshots of your childhood, knowing how to restore your old photographs can make a significant difference in preserving your memories for future generations. At Memory Cherish, we believe that every photograph deserves a second chance, and with the right tools and techniques, you can turn damaged images into dazzling works of art.
Understanding the Restoration Process
Restoring photographs involves a combination of digital and physical techniques aimed at repairing damage and enhancing the original quality of the images. While it may seem daunting, breaking the process down into manageable steps makes it achievable for anyone, regardless of skill level. The primary goal is not only to fix visible imperfections but also to retain the essence and emotional weight of the original image. By following a few straightforward methods, you can breathe new life into your cherished memories and enjoy them for years to come.
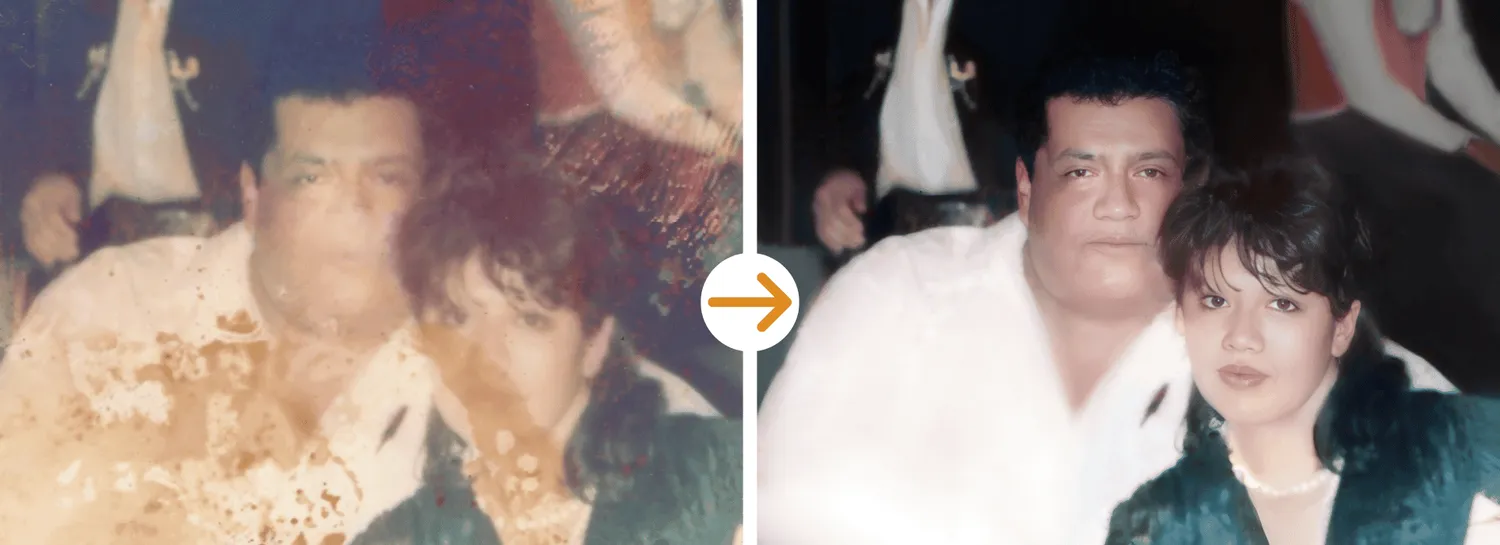
Step-by-Step Guide to Restoring Photos
1. Assess the Damage: Start by closely examining the condition of the photo. Identify issues such as fading, discoloration, tears, or stains. Understanding the extent of the damage will guide your restoration approach.
2. Digitize Your Photos: The first step in restoring photos is to create a digital copy. Use a high-resolution scanner to capture the image in detail. This allows you to work on the photo without risking further damage to the original. If you don’t own a scanner, consider visiting a professional service that specializes in digitizing photographs.
3. Clean the Photograph: Before you begin editing, gently clean the surface of the photograph with a soft, dry cloth to remove any dust or debris. Avoid using moisture or cleaning solutions, as these can damage the image. If there are sticky residues, use a tiny amount of adhesive remover applied with a cotton swab, testing it on a small area first.
4. Utilize Photo Editing Software: Once you have a digital version, it’s time to use photo editing software like Adobe Photoshop or GIMP. Here are some key techniques to consider:
- Color Correction: Adjust the brightness, contrast, and saturation to restore faded colors and bring back vibrancy to the image.
- Healing Brush Tool: Use this tool to paint over scratches and blemishes. It blends the affected area with surrounding pixels for seamless repairs.
- Clone Stamp Tool: For larger damaged areas, replicate textures from undamaged parts of the photo to cover flaws effectively.
- Sharpening: Enhance overall clarity and details to make the image pop, ensuring that the restored photograph retains its original charm.
5. Restore Physical Photos (if applicable)
- If you prefer to work on the physical photo, consider these restoration techniques:
- Repairing Tears: Use archival tape or acid-free adhesive to mend tears carefully, ensuring the tape won’t damage the photo over time.
- Flattening Curling: If your photo has curled edges, place it between heavy books or use a photo press to flatten it out gently. Avoid heat, which can cause further damage.
6. Print High-Quality Copies: After restoring the digital version of your photo, consider printing high-quality copies to share with family and friends. Many printing services offer archival-quality prints that can withstand the test of time, allowing you to enjoy your revived memories without risking damage to the original.
7. Store Your Photos Properly: Proper storage is essential for preserving both the original and restored photographs. Store them in acid-free sleeves or boxes to protect against environmental factors like humidity and light exposure.
8. Share and Celebrate Your Memories: Once your photos are restored, don’t keep them hidden away! Create albums or digital slideshows to showcase your revitalized images. Sharing these memories can create opportunities for storytelling and bonding with loved ones, making the restoration process even more meaningful.
Preserving Memories
Restoring photos is not just about fixing damaged images; it's about preserving the memories and stories that connect us to our past. By following these straightforward techniques and utilizing modern tools, you can successfully engage in the art of restoring photos and breathe new life into your cherished memories. At Memory Cherish, we are passionate about helping you protect and celebrate your family history, ensuring that your treasured photographs remain vibrant and accessible.