One day I decided to build a new cool home theater that features a UST projector and a cool and shiny and wonderful NothingProjector Black Series Motorized Screen. I can totally recommend this screen (and huge kudos to the NothingProjector support team, which is not only proactive and quick to respond but also answers with zero chatbot-ish bullshit).
But I have to say, this screen comes with a bit of a catch: its controller unit is… well… kinda ugly. In addition, for this screen to show (and hide) automatically when you turn your projector on (or off), you need a special USB stick that, in the case of my Hisense PX3 Pro, has to go into the USB port on the right, which is also why the whole setup starts looking a bit ugly.
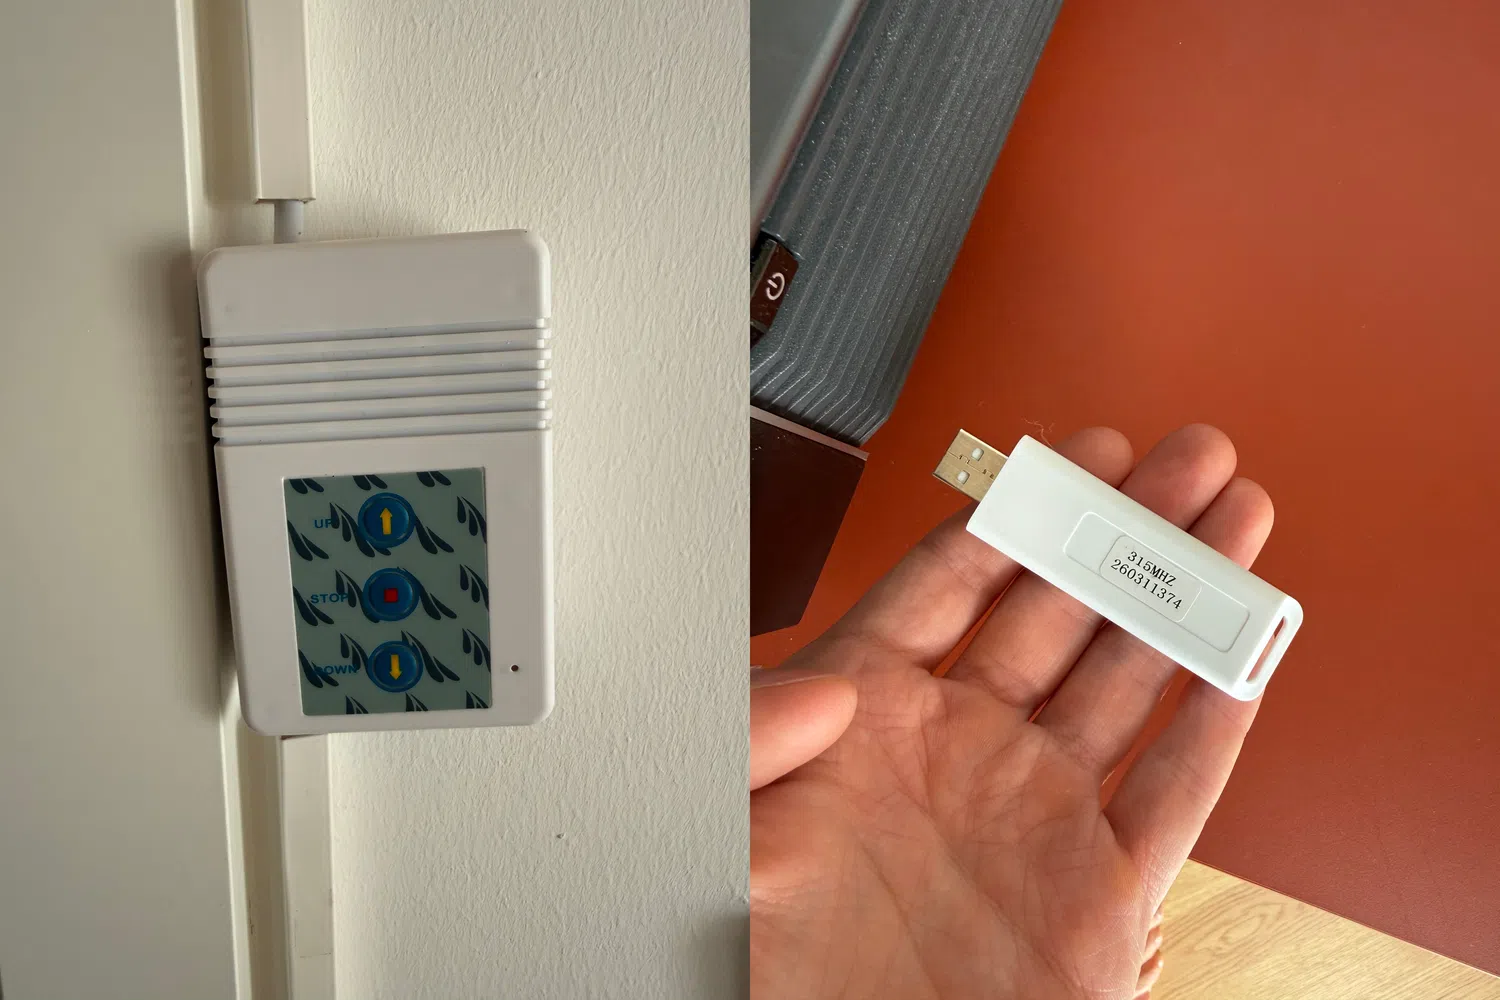
The label on the back of the control unit says "TP-02RF," which appears to be a pretty common controller used by NothingProjector and other Chinese projector screen manufacturers.
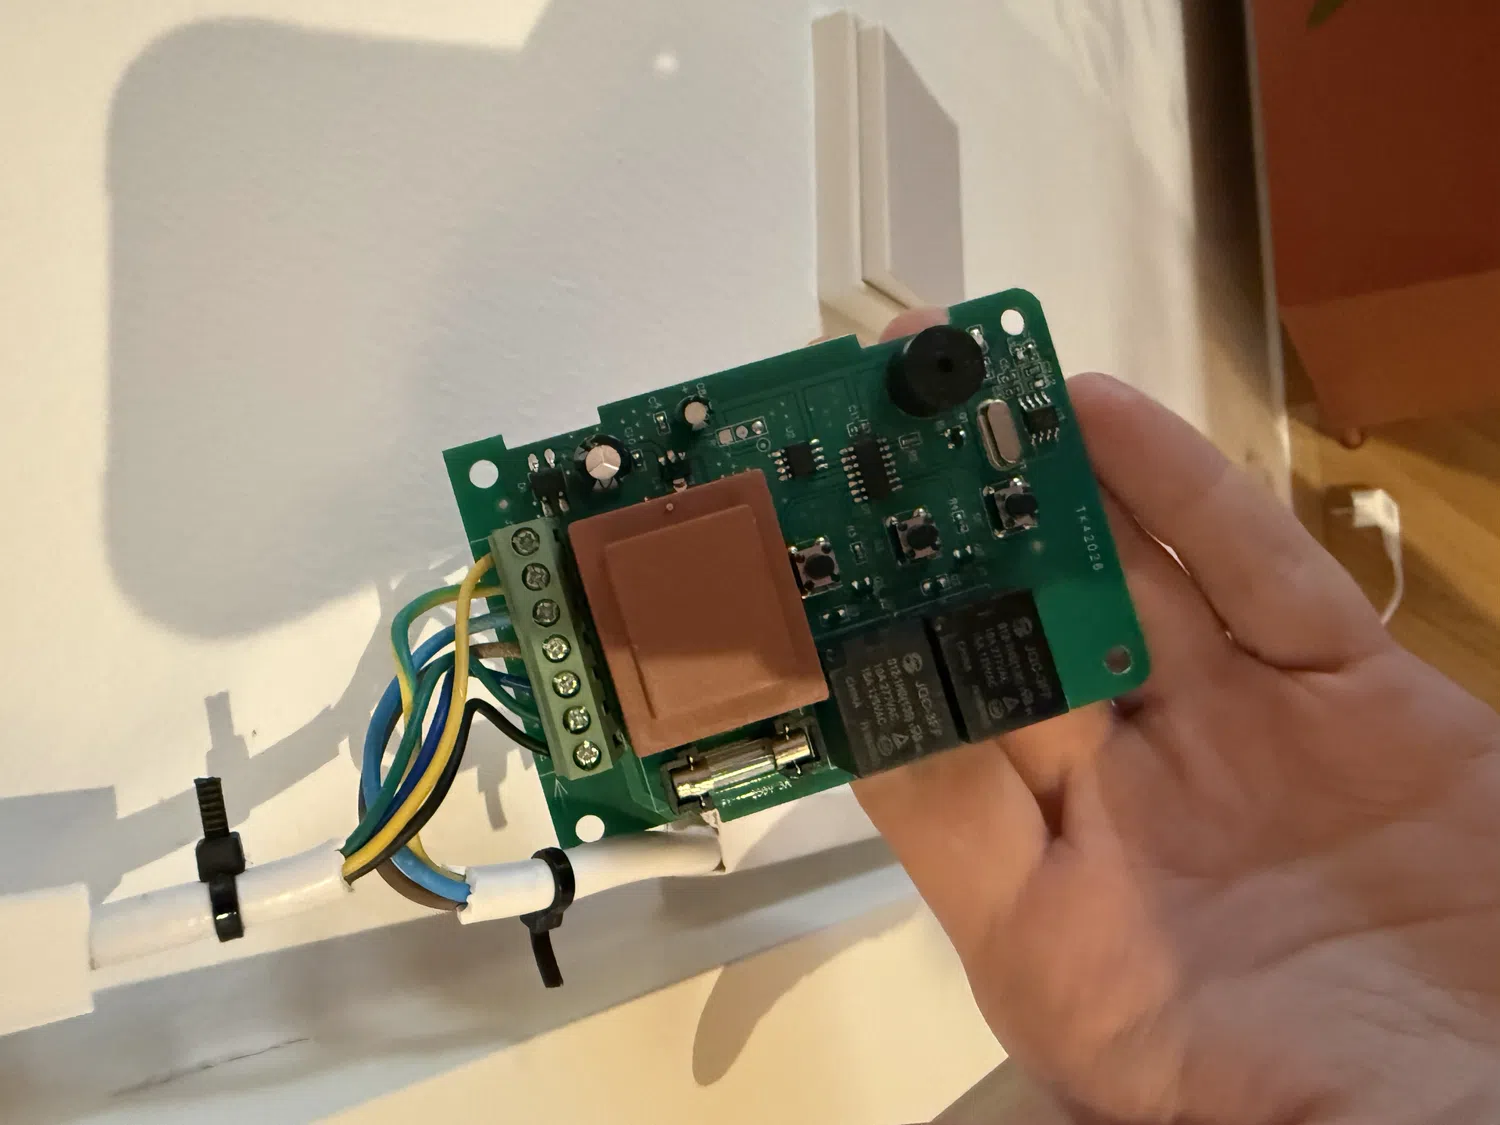
And if we open the case up then we will see that it has a transformer, two relays and an RF receiver. Its only real job is to send mains power to one of the motor's two windings: one for up, one for down.
That's exactly how Venetian blinds work! And there are plenty of smart devices for controlling Venetian blinds. On top of that, this controller is wired in a way that makes it completely replaceable (thanks to those Chinese geniuses who designed it).
In about 10 minutes I was already looking at the Shelly 2PM Gen4, because it was one of the few options Amazon could deliver the next day (though the Sonoff DUALR3 would be another solid option that should be available almost anywhere in the world).
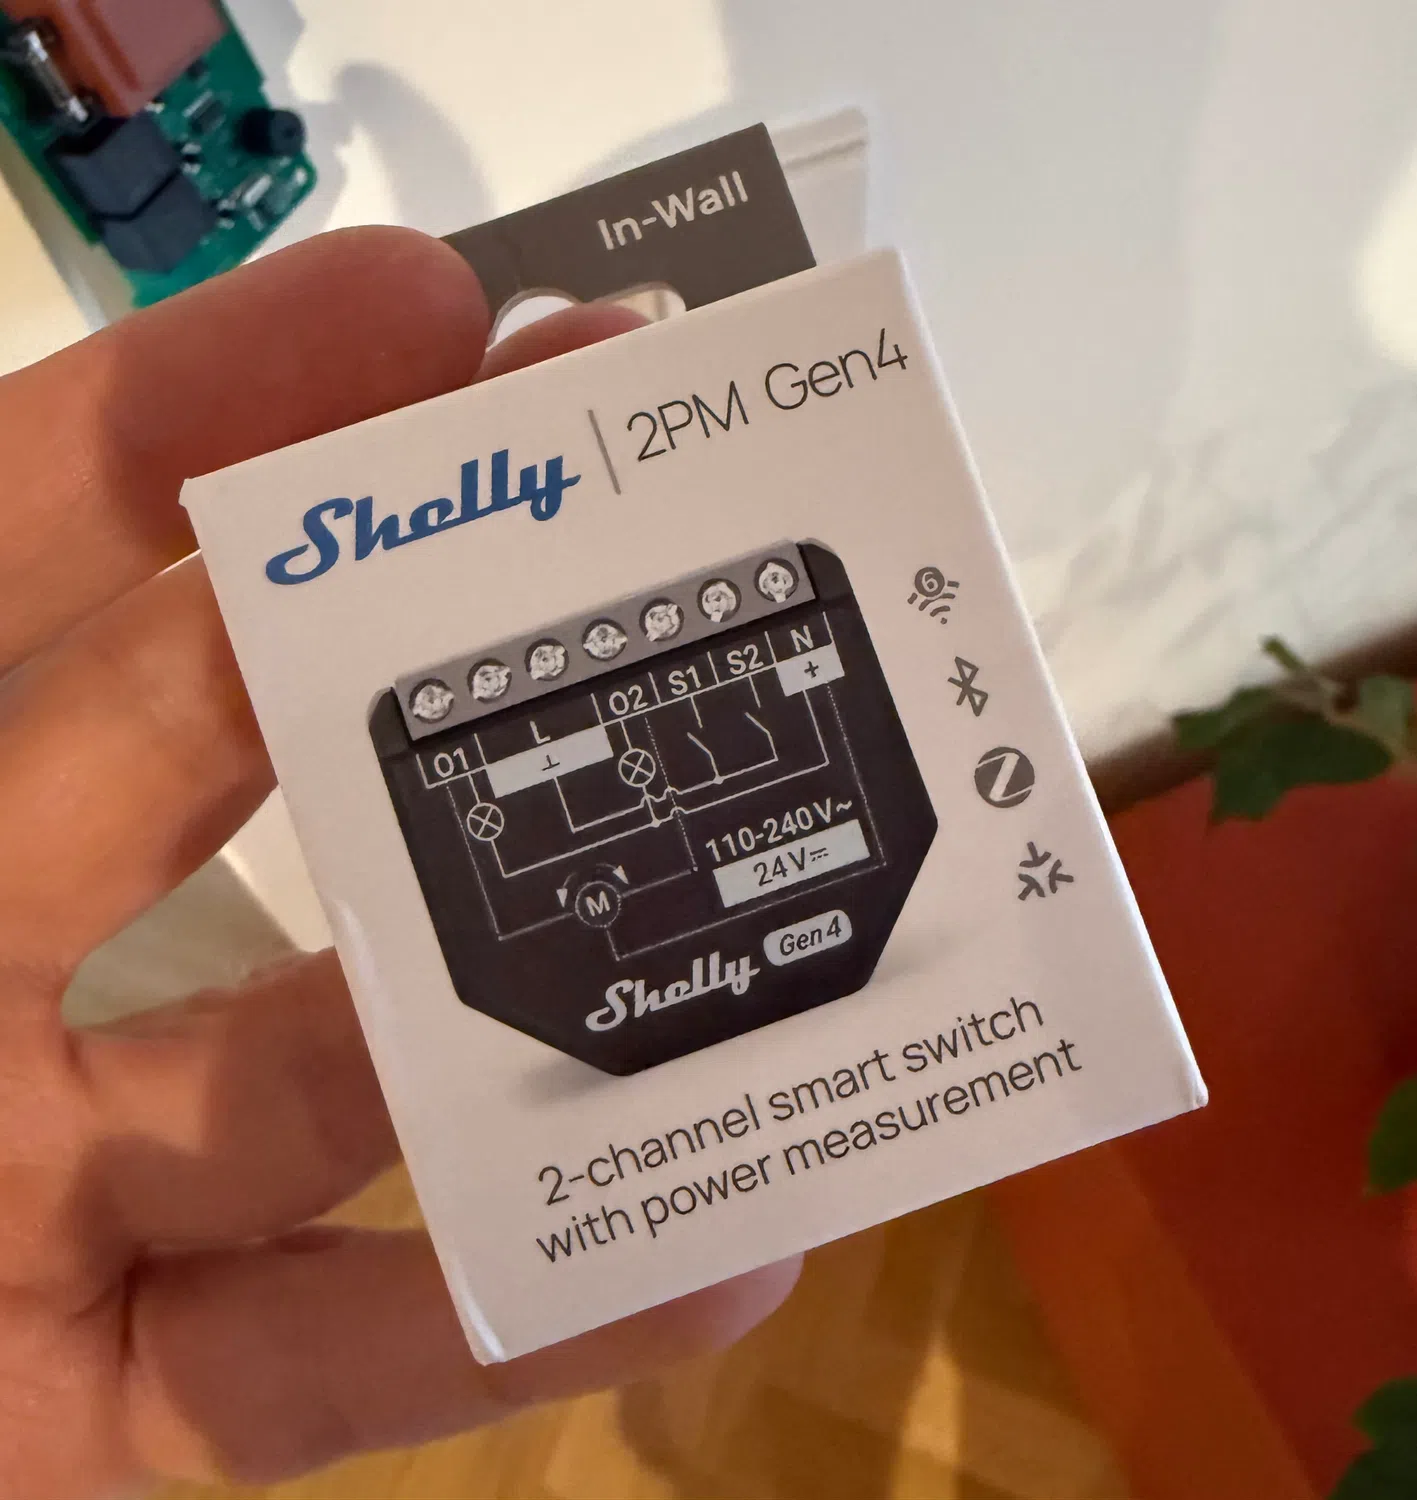
Swapping the box for a Shelly 2PM Gen4 (or any other similar controller) gives a bunch of cool benefits:
Much less bulk. The Shelly fits in a small junction box or a deep wall box.
Control from anywhere. Up, stop and down from the Shelly app or a Home Assistant card.
Precise position control. After calibration you can lower the screen to, say, 85% for 21:9 content.
Obstacle detection. The Shelly stops the motor if current rises because the screen is blocked.
Automation without the dongle. The screen follows the projector's real on/off state, detected over the network or by a power-measuring plug.
How the wiring works
The screen motor is a standard reversible AC tubular motor with four wires: up, down, common and earth, plus built-in limit switches that stop it at each end.
The only issue is that all the labels on the original controller are in Chinese but sending the picture of them to Claude helped me figure how to do the wiring:
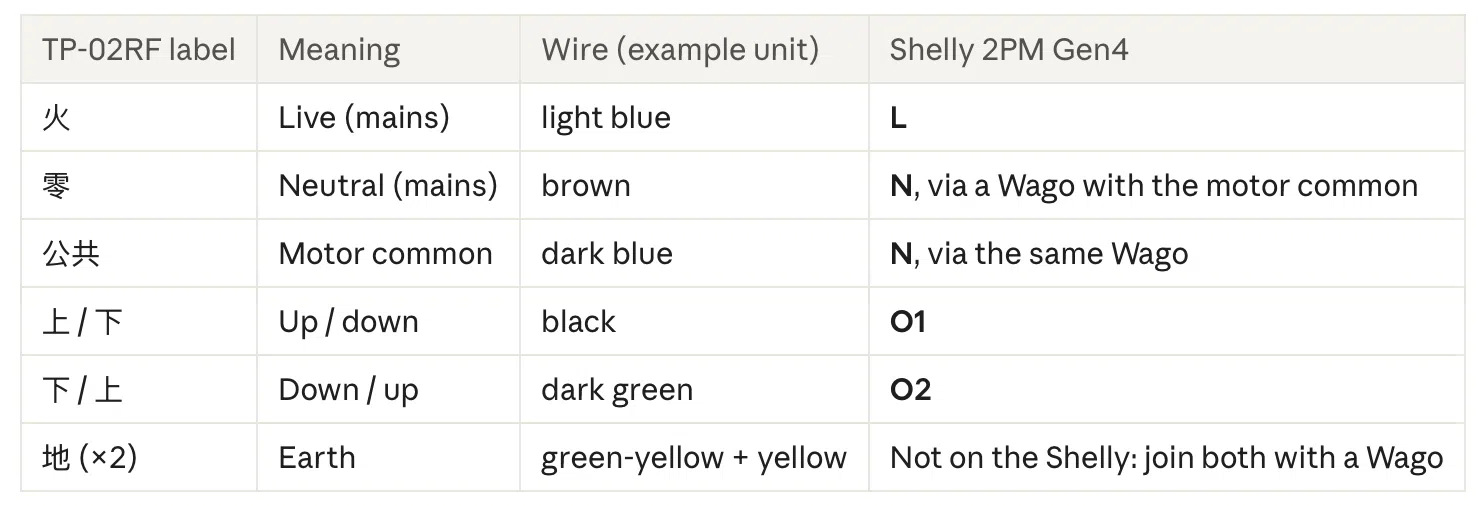
Disclaimer: Wire colours are from one real unit and may differ on yours, so always go by the terminal label. On this unit the mains brown and blue wires were swapped relative to European colours. With a reversible Schuko plug this makes no practical difference. The S1 and S2 inputs stay empty unless you add wall buttons (which could be an amazing addition to the whole project if you mount it all inside a wall).
Here is you need
Shelly 2PM Gen4 (a Gen3 or Plus 2PM works the same way) / Sonoff DUALR3 / etc
Wago 221-413 (3-way) for neutral and Wago 221-412 (2-way) for earth
5–10 cm of flexible 0.75–1.5 mm² wire, ideally blue, as the neutral jumper to the Shelly
Wire ferrules and a crimper for the stranded ends going into screw terminals
A small insulated junction box with cable glands
Small screwdriver and wire stripper
Optional: a Shelly Plug S Gen3 (or Plug PM Gen3) to detect when the projector is on (more on that later)
Step by step
The one step that protects the motor is switching the Shelly to Cover mode before the motor wires are connected.
Unplug the screen and photograph the TP-02RF terminals with the wires in place.
Remove the wires from the TP-02RF. Crimp ferrules onto the stranded ends that will go into the Shelly.
Connect power only. Live (火) to L, neutral (零) to N. Insulate the motor wires and keep them away from the Shelly for now.
Set up the Shelly. Plug in, add it in the Shelly app or open its web interface, and connect it to Wi-Fi.
Switch to Cover mode. Settings → Device profile → Cover. In the default two-relay mode both windings could be powered at once, which can burn out the motor.
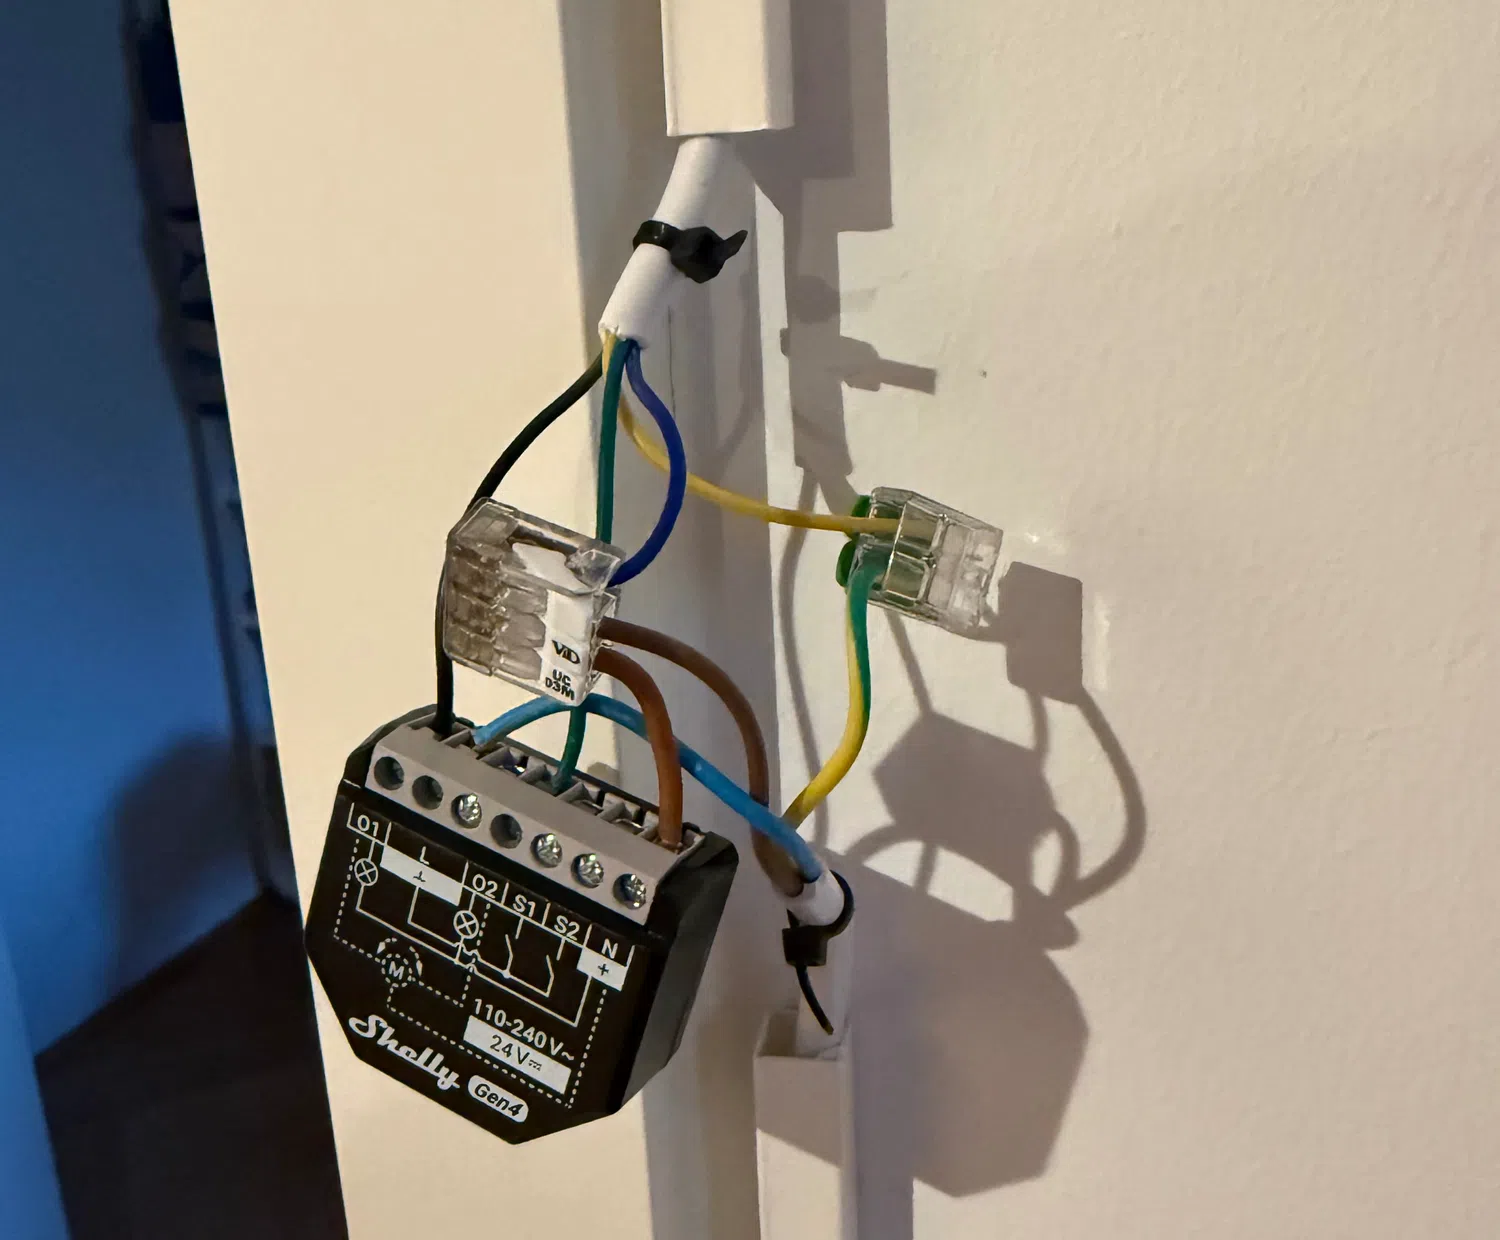
Unplug again and connect the motor. Up/down wires to O1 and O2. Mains neutral, motor common and a short jumper to the Shelly's N go into one Wago. Both earth wires go into the other Wago.
Calibrate. Plug in and start calibration in the app (Settings → Calibration). The Shelly runs the screen end to end and learns the travel time. Stay close and unplug if the motor does not stop at an end.
Fix the direction if needed. If "open" lowers the screen, enable Reverse directions in the settings instead of swapping wires.
Close it up. Put the Shelly and Wagos in an insulated box with cable glands. Never leave mains connections exposed.
Keep the old TP-02RF in a drawer. With the photo from step 1 you can put it back in five minutes.
This is how it’s gonna look like. If you have buttons somewhere, those could also be wired to S1 and S2.
Lowering the screen automatically
The USB dongle only talks to the TP-02RF, so the Shelly needs another way to know the projector is on. The most reliable one is a power-measuring plug.
I used a Shelly Plug S Gen3 (but any smart plug with power measurement will work).
Plug the projector itself into a Shelly Plug S Gen3 and add it to Home Assistant. A projector draws a few watts in standby and hundreds of watts when running, so a simple threshold works. Set the plug to power on after an outage and hide its switch entity so nobody cuts power to the projector by accident.
alias: Projector screen autoation
triggers:
  - entity_id:
      - sensor.shelly_projector_plug_power
    above: 15
    for:
      hours: 0
      minutes: 0
      seconds: 1 # you can tweak this number
      milliseconds: 0
    id: projector_on
    trigger: numeric_state
  - entity_id:
      - sensor.shelly_projector_plug_power
    below: 15
    for:
      hours: 0
      minutes: 0
      seconds: 3 # you can tweak this number
      milliseconds: 0
    id: projector_off
    trigger: numeric_state
actions:
  - choose:
      - conditions:
          - condition: trigger
            id: projector_on
        sequence:
          - target:
              entity_id: cover.shelly_projector_screen
            action: cover.close_cover
            data: {}
      - conditions:
          - condition: trigger
            id: projector_off
        sequence:
          - target:
              entity_id: cover.shelly_projector_screen
            action: cover.open_cover
            data: {}
mode: restart
Check your projector's real standby and running figures in the plug's power graph and adjust the thresholds.
The result
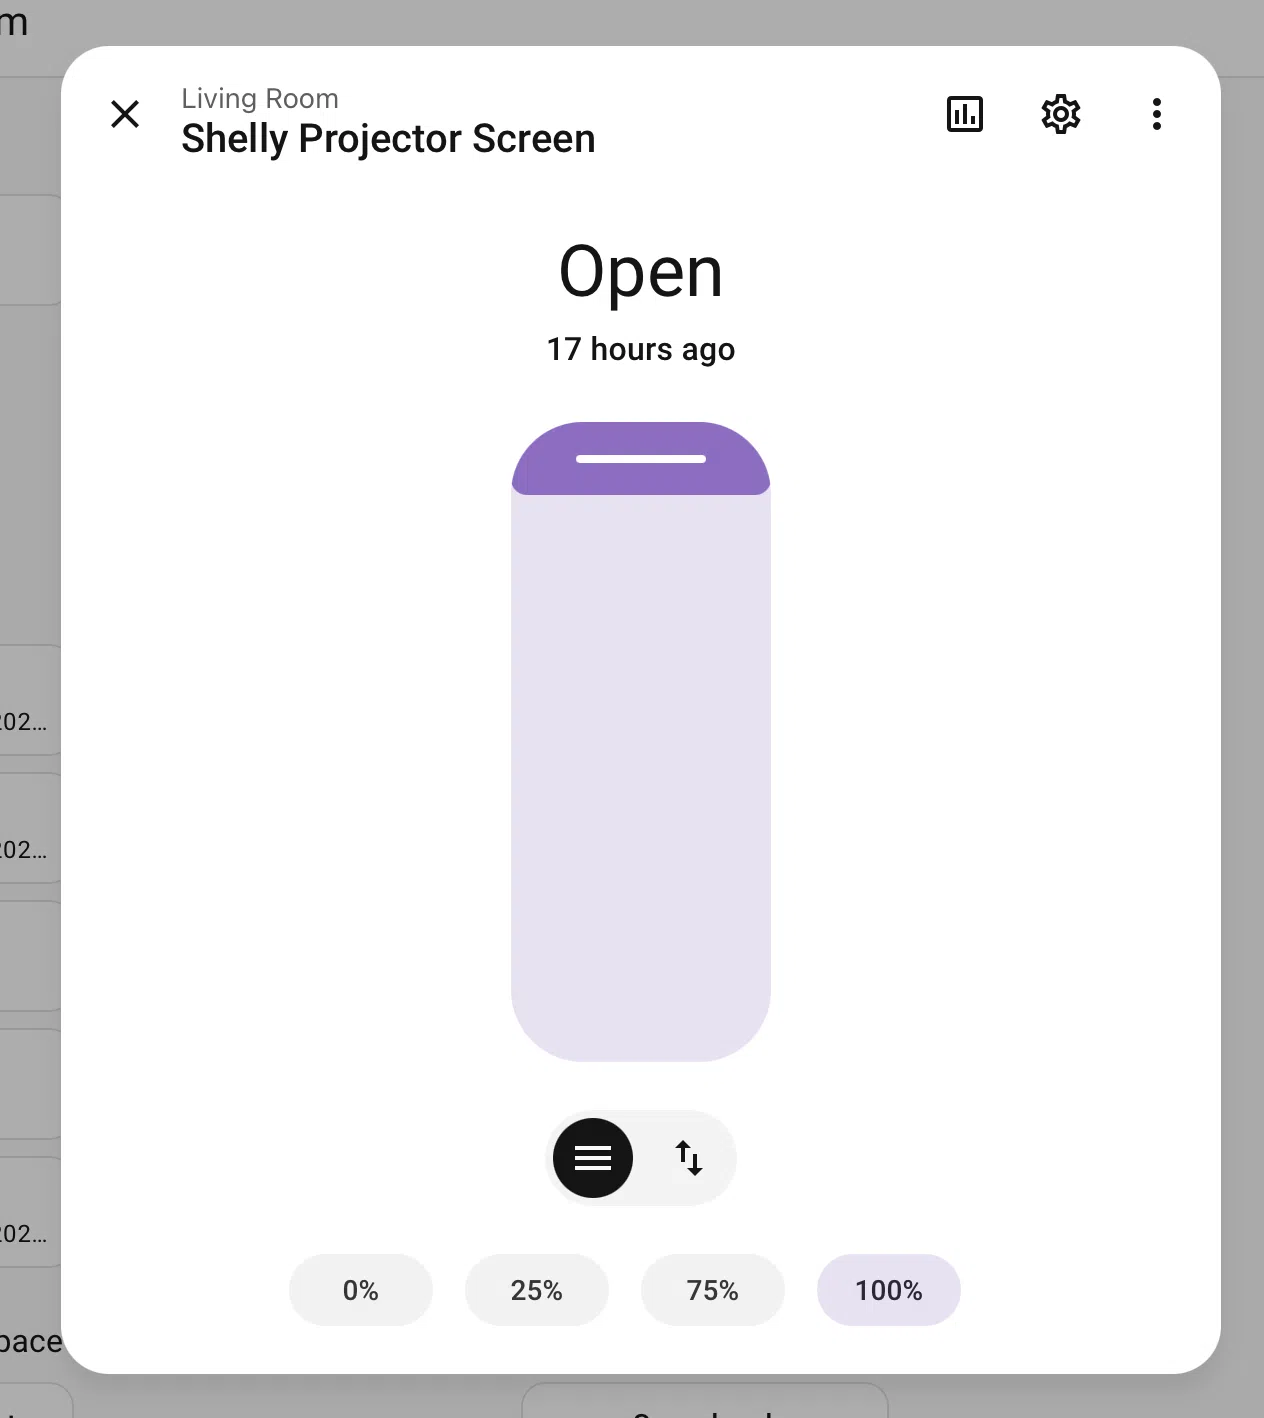
Everything lives in Home Assistant now — you can easily control it from there or with pretty much any smart button you can buy these days. You can also add it all to HomeKit or Google Home — the possibilities are almost endless, because your projector screen now supports Matter, Zigbee, Bluetooth, and Wi-Fi, has its own app, and can be precisely monitored and controlled via Home Assistant.
That's it! If you have any questions, feel free to email me directly at alex@apantiukhov.com
30/09/2026