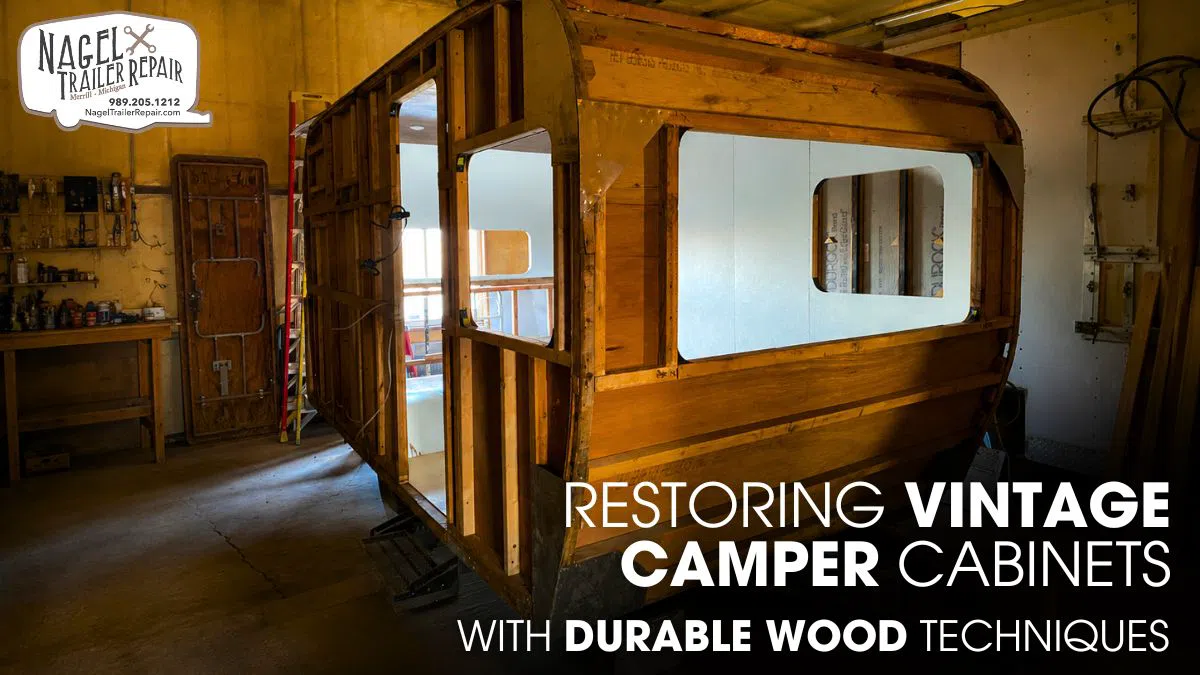
Vintage camper cabinets add character, warmth, and timeless craftsmanship to a classic RV interior. When restored correctly, these wooden features can preserve the camper’s original appeal while delivering dependable everyday performance.
However, years of moisture, temperature changes, vibration, and regular use can weaken cabinet joints, warp panels, and damage wood surfaces. Poor repair methods can also create recurring cracks, loose hardware, and moisture-related deterioration.
Durable restoration methods can address damage while preserving authentic vintage character. For vintage camper restorations in Michigan, reinforce weak areas, repair structural issues, choose quality wood, and apply protective finishes. These techniques create cabinets that retain their classic appearance while delivering lasting strength and reliable performance.
Assessing Vintage Camper Cabinet Damage:
A thorough inspection should always come before restoration work. Vintage camper cabinets often contain hidden damage beneath old paint, laminate, veneer, or previous repair patches. Start by examining cabinet boxes, face frames, doors, shelves, drawer assemblies, and mounting points separately.
Look for cracks, loose joints, delamination, swelling, discoloration, and areas where fasteners no longer hold securely. Moisture deserves special attention because it can weaken wood from the inside. Inspect cabinets located beside sinks, water lines, windows, exterior walls, and roof penetrations.
A moisture meter can help identify areas with elevated moisture content that may not show obvious visual damage. You can also gently probe questionable sections with a sharp awl to determine whether the wood still has adequate structural hardness.
Check for soft, brittle, or punky wood fibers.
Inspect veneer edges for lifting or bubbling.
Check cabinet corners for joint separation.
Examine screw holes for enlargement or cracking.
Measure warped panels before removing them.
Locate the original source of any water intrusion.
Never conceal rotten wood with filler, even when the damage appears minor. Remove all weakened fibers until you reach solid, stable material. A vintage camper expert in Michigan can ensure the repair uses a clean, structurally sound substrate, providing dependable mechanical strength and long-term durability.
Selecting Durable Wood Repair Materials:
The replacement material should match the cabinet’s structural requirements rather than simply matching its appearance. Face frames, rails, and stiles can benefit from dimensionally stable hardwood, while cabinet sides and larger panels often perform better with quality plywood. Plywood resists dimensional movement better than many solid-wood panels and can provide useful stability inside a moving RV.
Pay attention to thickness, grain orientation, density, and fastener-holding capacity. Replacing a thin original panel with unnecessarily thick material can alter clearances and add weight. Extra weight also increases the load placed on cabinet mounts while the camper travels over rough surfaces.
Match replacement thickness to the original component.
Choose plywood with stable, strong veneers.
Match grain direction on visible solid-wood repairs.
Use compatible wood adhesive for structural joints.
Reserve filler for cosmetic imperfections.
Avoid unnecessary material that adds RV weight.
Wood movement plays a key role in long-term cabinet durability. Solid wood naturally expands and contracts across the grain as humidity shifts. During vintage camper repairs in Michigan, allowing proper movement helps prevent joint stress, cracked finishes, warped panels, and other seasonal damage while preserving structural integrity.
Preparing Cabinets for Restoration:
Good preparation makes the actual restoration much easier. Remove doors, drawers, hinges, latches, handles, and other hardware carefully. Label each component or photograph its original position so you can reproduce the factory configuration during reassembly. This matters because vintage cabinets may use unusual spacing or hardware that does not follow modern cabinet standards.
Remove loose coatings and failed repair material without aggressively stripping sound original wood. When the cabinet contains veneer, use controlled sanding pressure because excessive sanding can expose the substrate. For adhesive repairs, remove old adhesive from the mating surfaces and expose clean, solid wood.
Dry-fit replacement pieces before applying adhesive. Check the cabinet’s overall geometry, joint alignment, door clearances, drawer travel, and hardware positions. If a component only fits when you apply excessive force, correct the dimensions before permanent assembly.
Use progressive sanding rather than aggressive material removal.
Protect original veneer and decorative edges.
Clean dust from bonding surfaces.
Create accurate templates for replacement panels.
Dry-fit every structural component.
Verify alignment before applying adhesive.
A precise preparation process helps prevent dimensional errors from becoming permanent while creating a smooth, consistent foundation. For a vintage camper shop in Michigan, this careful approach also ensures primers, stains, and protective coatings bond evenly for a durable, professional finish.
Applying Strong Wood Repair Techniques:
Structural restoration should rebuild the cabinet’s original load path. Do not depend on filler to hold a joint together. For a loose joint, separate the components when possible, remove failed adhesive, clean the mating surfaces, and reassemble them with an adhesive suitable for the materials and exposure conditions.
When damage extends beyond the original joint, reinforce the area from inside the cabinet. Hardwood cleats can strengthen corners while remaining hidden from view. Depending on the construction, properly fitted dowels, splines, or biscuits can improve alignment and increase the effective bonding area. Machine these joints accurately so the reinforcement works with the existing structure rather than forcing it out of square.
RV cabinetry faces repeated vibration and impact that stationary household furniture does not experience. That vibration can gradually loosen poorly supported fasteners. Repair damaged screw holes before reinstalling hardware and ensure screws enter sound material.
Apply even clamping pressure during adhesive curing.
Reinforce weak corners from inside the cabinet.
Repair stripped or enlarged screw holes.
Maintain accurate joint geometry.
Avoid crushing soft wood during clamping.
Test structural repairs before refinishing.
After curing, repeatedly operate every door and drawer to verify smooth movement. Inspect for binding, uneven gaps, hinge shifts, and drawer misalignment. A camper trailer expert in Michigan can ensure precise alignment, reducing mechanical stress and helping prevent premature hardware and joint failure.
Protecting Cabinets From Moisture Damage:
Moisture protection determines how long a cabinet restoration will survive. Wood continuously exchanges moisture with surrounding air, and repeated humidity changes can cause dimensional movement. Persistent water exposure creates more serious problems, including swelling, fungal decay, delamination, adhesive failure, and finish deterioration.
Seal exposed surfaces thoroughly, paying particular attention to end grain. End grain contains open cellular pathways that can absorb moisture rapidly. Seal repaired sections and exposed edges with a compatible coating system, but do not assume a finish alone will solve a water problem.
Find and correct the source of moisture before completing the restoration. Inspect plumbing connections, sink interfaces, window seals, roof penetrations, exterior seams, and wall transitions. Water can migrate considerable distances inside RV construction before appearing as a visible stain.
Seal exposed end grain carefully.
Protect cabinetry around sinks and plumbing.
Inspect hidden cabinet surfaces for moisture.
Repair exterior leaks before refinishing.
Maintain adequate interior ventilation.
Reinspect vulnerable areas after heavy rain.
Apply primer, stain, paint, or a clear finish according to the coating manufacturer’s specifications for lasting protection. For reliable vintage camper services in Michigan, always follow proper surface preparation, recoat intervals, and curing times to ensure strong adhesion and prevent trapped moisture or solvents from weakening the coating system.
Finishing and Maintaining Restored Cabinets:
The final finish should protect the cabinet without making it look out of place in a vintage camper. Consider the wood species, existing finish, expected abrasion, moisture exposure, and cleaning requirements before selecting a coating. A clear finish can highlight natural grain, while paint can provide a consistent protective barrier on previously painted cabinetry.
Always test the selected stain or finish on scrap wood before applying it to visible surfaces. Old wood can absorb coatings differently from new material, and even small differences in substrate preparation can produce noticeable color variations.
Allow the coating to cure completely before installing hardware. Tighten screws firmly but avoid excessive torque, which can strip restored wood fibers. Align hinges, latches, and drawer components carefully so they do not place unnecessary loads on the cabinet structure.
Match the finish sheen to the camper interior.
Allow full curing before regular use.
Check hardware alignment during installation.
Inspect joints after extended travel.
Clean surfaces with finish-compatible products.
Repair small coating failures promptly.
Perform periodic inspections, particularly after long trips, heavy rain, winter storage, or extended periods of high humidity. Look for swelling, cracked coatings, loose hardware, water stains, and separating joints. Addressing these issues early can prevent a small repair from becoming a complete cabinet rebuild.
A durable restoration combines careful woodworking with an understanding of how an RV behaves on the road. The goal goes beyond making an old cabinet look new. Quality work restores structural strength, limits moisture damage, supports natural wood movement, and handles road vibration.
With precise measurements, durable materials, solid joinery, reinforcement, and a compatible finish, vintage cabinetry stays authentic and functional. Professional vintage trailer repairs in Michigan can help preserve its long-term performance.
The Role of Professional Maintenance:
Professional maintenance helps preserve the strength and appearance of aging camper interiors. Skilled technicians can identify weakened cabinet joints, deteriorated wood, moisture damage, and loose fasteners before these issues spread. They use compatible wood adhesives, precision reinforcement, proper sanding methods, and moisture-resistant finishes to restore structural integrity while maintaining the original character.
This approach improves durability and helps cabinetry withstand vibration, humidity, temperature changes, and regular RV use. Sticking windows also require careful inspection because dirt, hardened seals, frame distortion, corrosion, or misalignment can restrict movement.
A professional can clean the tracks, inspect hardware, replace damaged weatherstripping, correct alignment, and apply a suitable lubricant without damaging vintage components. Proper maintenance improves window operation, reduces air and water infiltration, and protects surrounding wood from moisture-related deterioration. Regular inspections can prevent minor problems from becoming expensive restoration work.
Conclusion:
Restoring vintage camper cabinets requires more than sanding and refinishing. Accurate damage assessment, sound wood selection, precision joinery, and controlled reinforcement create a stable structural foundation.
Moisture control remains equally important. Sealing exposed wood, correcting leaks, and applying compatible protective coatings helps prevent swelling, rot, delamination, and premature finish failure.
With disciplined woodworking and routine inspections, Nagel Trailer Repair helps preserve cabinet strength while protecting vintage character. For reliable craftsmanship and lasting results, trust our experienced specialists for vintage camper restorations in Michigan. Restore your camper with confidence and keep it road-ready for years to come.
Tags: Vintage Trailer Repair Michigan, Vintage Camper Repair Michigan, Classic Camper Repair Michigan, Classic Trailer Repair Michigan, Vintage Camper Restoration Michigan, Classic Camper Restoration Michigan, Camper Restoration Michigan, Vintage Camper Expert in Michigan, Classic Camper Expert in Michigan, Vintage Camper Repair Expert in Michigan, Classic Camper Repair Expert in Michigan